I installed nextcloud on Raspberry Pi 4!

I want to have my own cloud storage!
Raspberry Pi is good because initial/maintenance costs look low!
I want to know how to setup without any mistake.
I will show how to do it!
What is nextcloud?
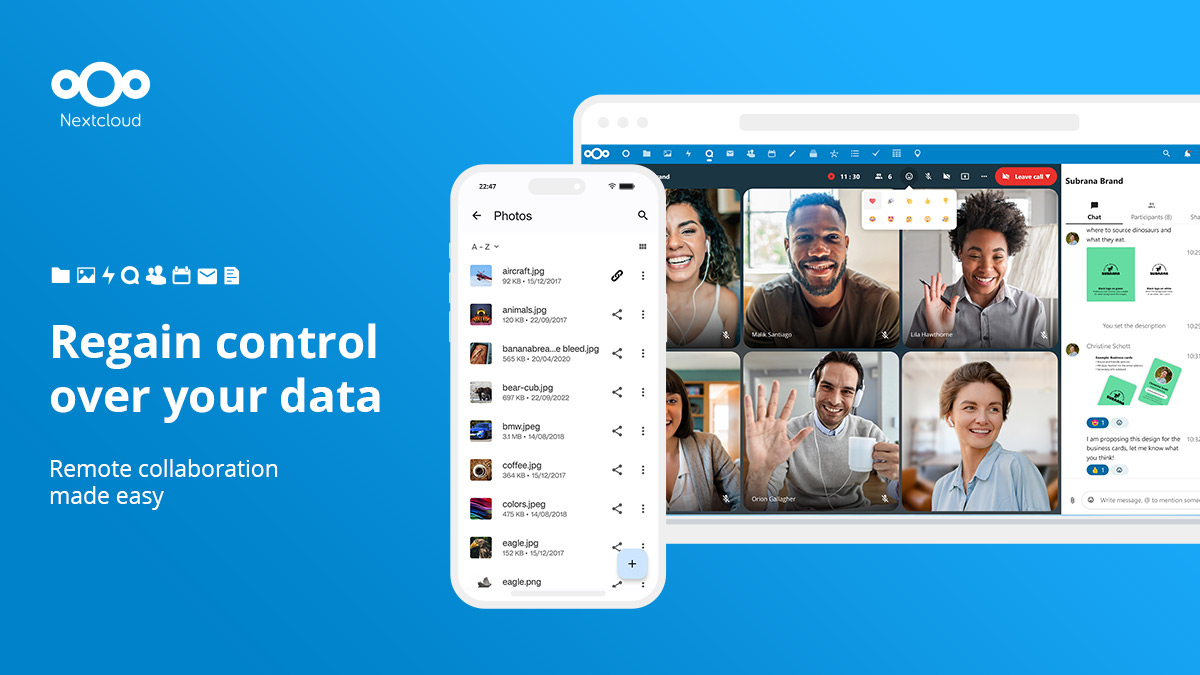

What is nextcloud?

nextcloud is one of the cloud storage software!
It is the same software as Google Drive and OneDrive.
One important difference is,
– Google Drive or OneDrive is maintained by Google or Microsoft.
– nextcloud should be maintained by you.
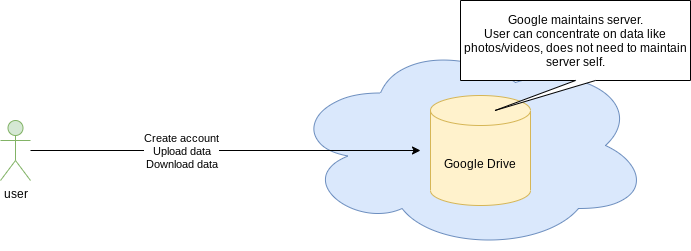
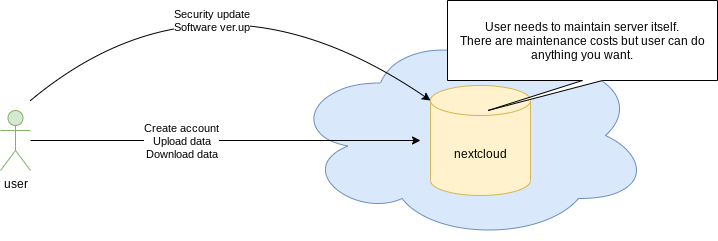
Therefore, if you use nextcloud, you can either run nextcloud yourself or share it with nextcloud that someone is running and save your data.
If you run nextcloud yourself, you’re also managing it yourself. Hence it is necessary
to have a level of specialized knowledge not only at setup but also during daily maintenance.
The advantages and disadvantages are summarized below.
| Method | Benefits | Disadvantages |
| Google Drive/OneDrive | – Low maintenance workload | – Difficult to recover data |
| nextcloud | – You can manage everything – You can stop if you want – Low cost in case large capacity | – HDD/SSD and computer is needed – Requires high skill |
Let me discuss maintenance costs for each method.
I compared maintenance cost for using storage capacity 10GB, 100GB and 1000GB.
Fixed IP address fee is 1200 JPY per month (in my case).
| Capacity | Google Drive method | nextcloud method |
| 10GB | Free | Electricity: About 60 JPY / month Fixed IP address fee: 1,200 JPY / month Total: 1260 JPY |
| 100GB | 250 JPY | ↑ |
| 1000GB | 1,300 JPY (*) | ↑ |

Fixed IP address fee is expensive compared to other costs🤔
Fixed IP address fee 1,200 JPY is based on the typical internet providers in Japan.
The gap between them are only a few hundred JPY -> a few US dollars per month.
You can play with Raspberry Pi/nextcloud only if you decrease on can of beer on weekend.
That is very attractive, isn’t it?
How to setup nextcloud

Let’s see the detail how to setup nextcloud
* Let me explain with example of IP address 192.168.1.20.
– Assign fixed IP address to Raspberry Pi
– Install web server
– Install nextcloud
– Install database
– Connect database and nextcloud
– Create non-admin user
The system structure is as follows
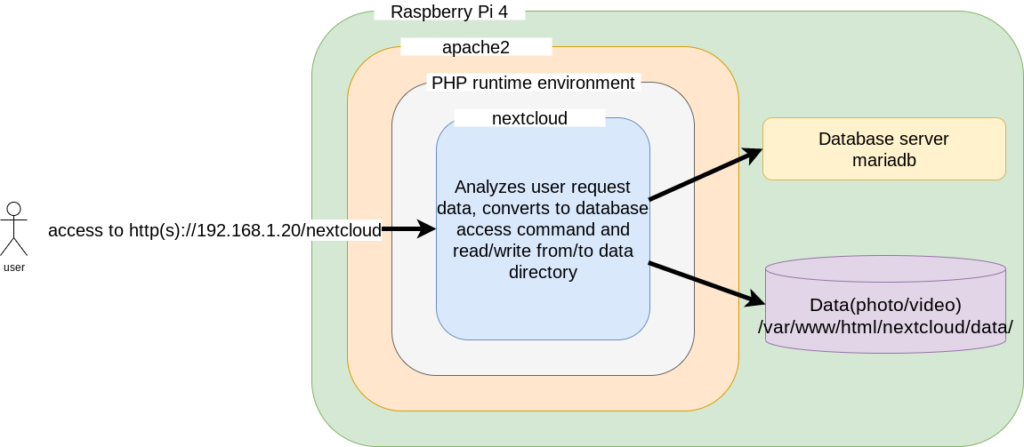
Assign fixed IP address to Raspberry Pi

In the setup method introduced in this article, IP address is automatically assigned by DHCP.
Therefore, IP address may change.
To avoid this, set IP address to fixed value.
Please add these lines to the end of /etc/dhcpcd.conf.
interface wlan0
static ip_address=192.168.1.20/24
static routers=192.168.1.1
static domain_name_servers=8.8.8.8
DNS server 8.8.8.8 is maintained by Google.
If you know DNS server provided by internet service provider, please put it.
Normally DNS server should be set as router’s IP address.
Install Web server

nextcloud is implemented by PHP.
Hence web server and PHP runtime environment are mandatory.
In this post I use apache2 + modphp.
You can install it including php extensions required by nextcloud with the following command.
pi@raspberrypi:~ $ sudo apt install apache2 lib apache2-mod-php php-mysql php-zip php-xml php-mbstring php-gd php-curl
Install nextcloud
For now nextcloud seems not to be able to be installed by apt command.
So we need to download zip file from the official site and deploy it to apache’s public directory.
Run the following command.
# Download the latest version
pi@raspberrypi:~ $ wget https://download.nextcloud.com/server/releases/nextcloud-20.0.1.zip

# Go to apache public directory
pi@raspberrypi:~ $ cd /var/www/html/

# Expand nextcloud to /var/www/html/nextcloud/
pi@raspberrypi:~ $ sudo unzip /home/pi/nextcloud-20.0.1.zip

# Change ownership so you can read and write from apache
pi@raspberrypi:~ $ sudo town -R www-data:www-data nextcloud
It is OK if /var/www/html/nextcloud/ exists whose owner is www-data:www-data as shown below.
pi@raspberrypi: ~ $ ls -l /var/www/html/
total 16
-rw-r--r--1 root root 10701 Nov 5 13:03 index.html
drwxr-xr-x 14 www-data www-data 4096 Nov 6 04:14 nextcloud
Let’s check if nextcloud is working.
Try acccessing http://192.168.1.20/nextcloud/ from your PC or smartphone.
The IP address should be aligned to your environment.
I think you can confirm that nextcloud is working as follows!
– Sorry captured images are Japanese.
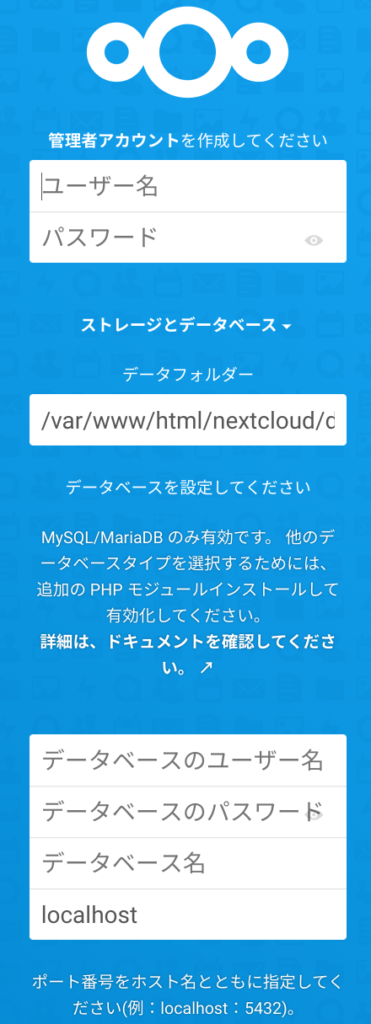
However, at this point, there is no database linked to nextcloud.
Install database and make it available from nextcloud.
Install database

The next part is to install database.
In this post I use mariadb which is mysql compatible.
pi@raspberrypi:~ $ sudo apt install mariadb-client mariadb-server
When installation is complete, set it up initially.
pi@raspberrypi:~ $ sudo mysql_secure_installation

# There is no root password by default, so enter without entering anything
Enter current password for root (enter for none):

# Enter by pressing Y to set root password
Set root password? [Y/n]

# Enter your new password twice
New password:
Re-enter new password:

# Since there is no anonymous user, press Y to Enter
Remove anonymous users? [Y/n]

# Since it is better not to log in to the root user remotely, press Y to enter
Disallow root login remotely? [Y/n]

# I don't need a test database, so press Y to answer
Remove test database and access to it? [Y/n]

# Since it reloads, press Y to Enter
Reload privilege tables now? [Y/n]
Link database to nextcloud

As of now, there is no relationship between database and nextcloud.
Let’s run the following commands to connect each other.
# Log in to the database as root
# Passwords must be set earlier
pi@raspberrypi:~ $ sudo mysql -u root -p
Enter password:

# Switch databases
Mari[none]aDB > use mysql;

# Create a database for nextloud
Mar[mysql]iaDB > create database nextcloud;

# Create a user
# String after create user contains each user
# String after identified by contains your ow[mysql]n password
MariaDB >create user 'pi'@'localhost' identified by 'abcdefghijklmn';

# Give users of your database access to the datab[mysql]ase
MariaDB > grant all privatees on nextcloud.* to 'pi'@'localhost';

# Reflect ↑permission settings
[mysql]MariaDB > flush privilleges;

# End
MariaD[mysql]B > quit;
mariadb side is now ready to accept nextcloud.
Next is the nextcloud side.
Let’s connect to mariadb.
Go to http://192.168.1.20/nextcloud.
Let’s enter as follows in the database settings of below.
– User name: pi
– password: abcdefghijklmn
– Database name: nextcloud
* Please specify the user name and password as you want.

You may see”Please specify the port number with the host name”, but you can ignore it.
If it goes well, top page will be displayed as follows!
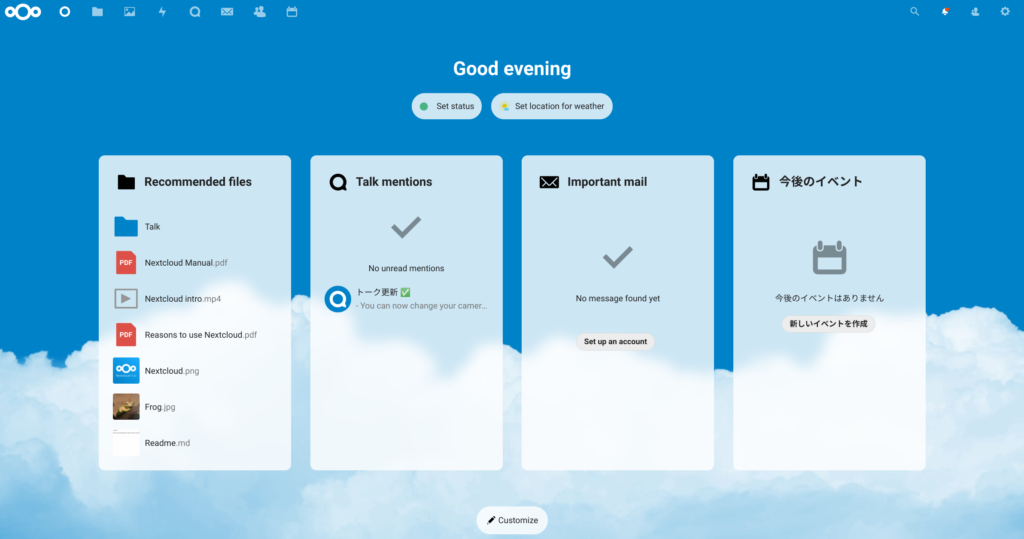
There is also a smartphone app!

Create a non-admin user
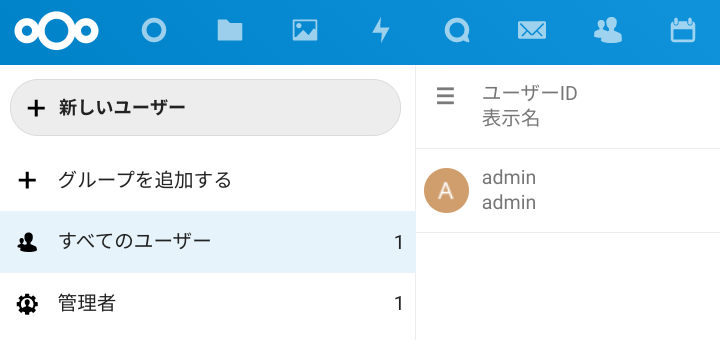
Now that there is only an administrator on nextcloud, let’s create a non-admin user.
Click the user’s icon in the upper right corner of the screen to see the user’s menu.
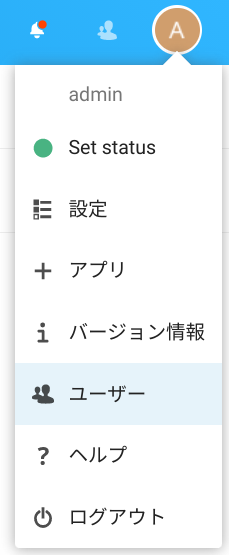
Now that you have a user list screen, let’s create a group and a user.
– Group: general
– user name: Create as yatch, etc.
That’s it!
Conclusion
How was it?
You might think it’s a high barrier because you need to setup by your own.
But most of the work is automated with commands, so workload is not so much.
I will continue to do as follows,
– Try other function such as talk which is embedded in nextcloud
– Obtain domain name and assign to Raspberry Pi
– Support https
– Two factor authentication
If you have any problems or unclear points do not hesitate to ask me!
In below article I introduce each step how to establish nextcloud on Raspberry Pi 4!
You should be interested in it too!



Comments