In this site I am hosting blog which theme is vacation/airbnb.
I installed CloudFront of AWS in front of this blog site.
As you may know CloudFront is high functional cache server.
It is usually used to AWS VPC, but I applied to my own Raspberry Pi.
You are free of charge for CloudFront if your monthly transmission data is less than 1TB.
This will be very useful for personal use.
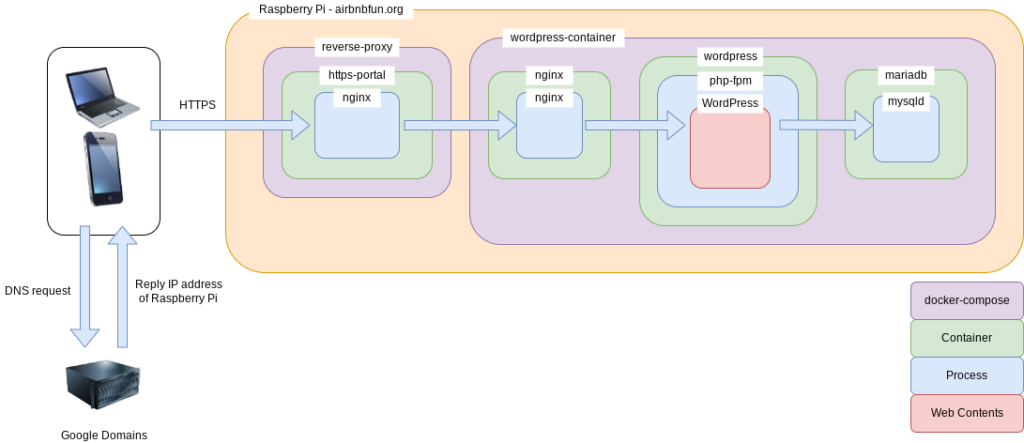
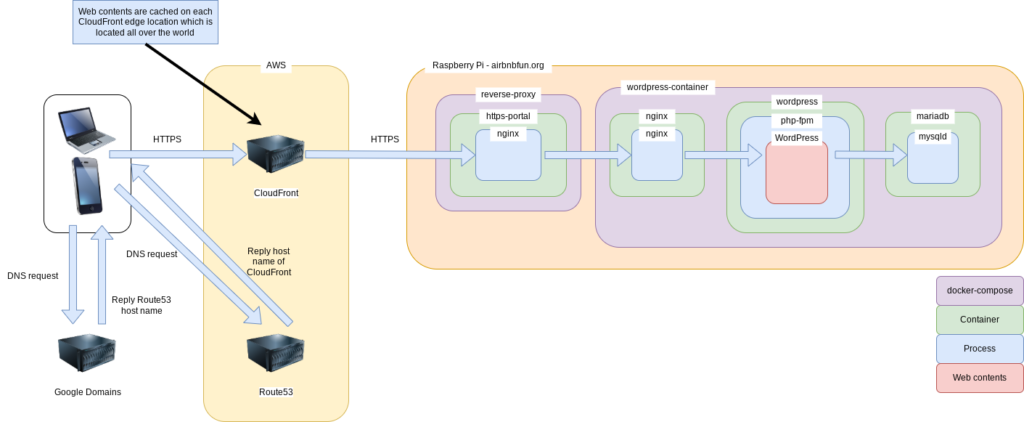
System architecture
Before
After
– You should notice CloudFront is inserted between client and Raspberry Pi.
My expectation is to increase performance by borrowing machine power of AWS because Raspberry Pi is low CPU power.
Create CloudFront distribution
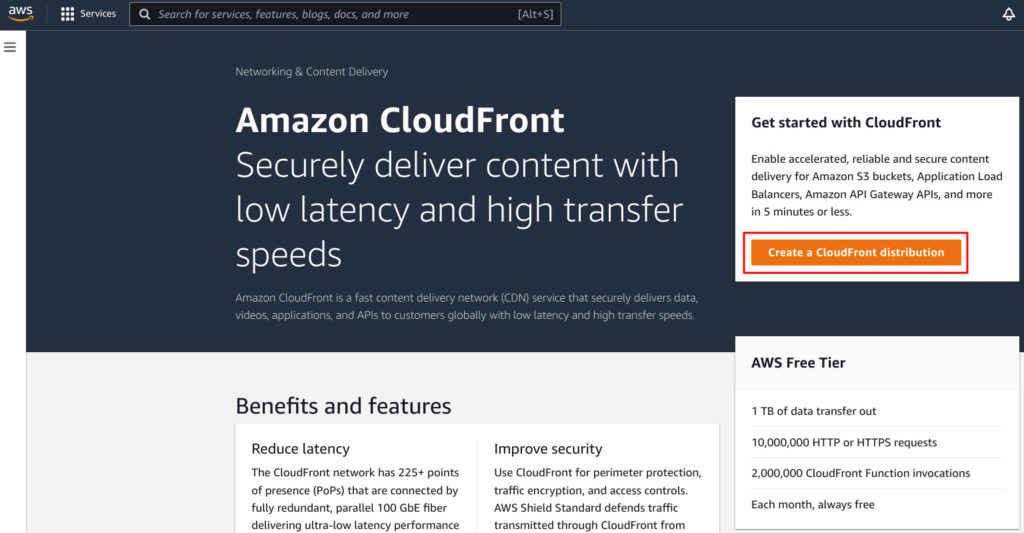
First you need to prepare CloudFront which is called “distribution”.
Create a CloudFront distribution.
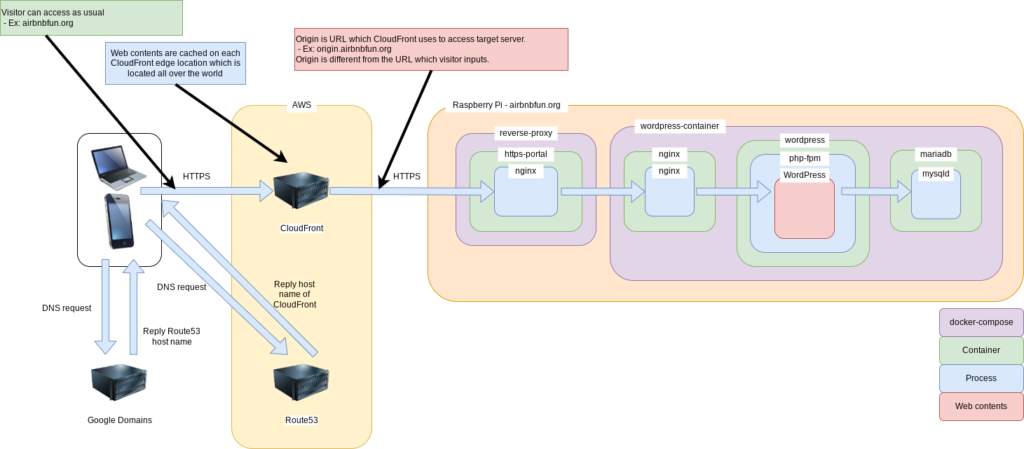
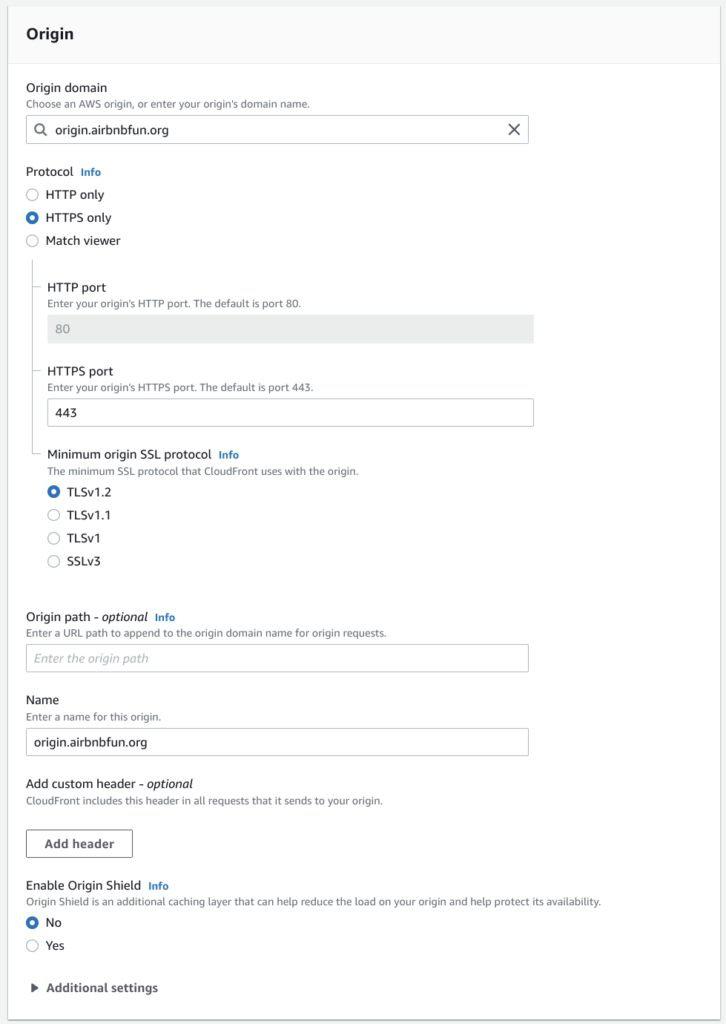
Input origin URL.
Origin means server whch has contents to be provided to visitor.
In previous diagram red rectangle part is origin URL.
Be careful it isn’t the URL which visitor inputs to browser.
In my case I configured as below.
URL user inputs
 - https://airbnbfun.org
Origin
 - https://origin.airbnbfun.org
Usually they are in the same domain.
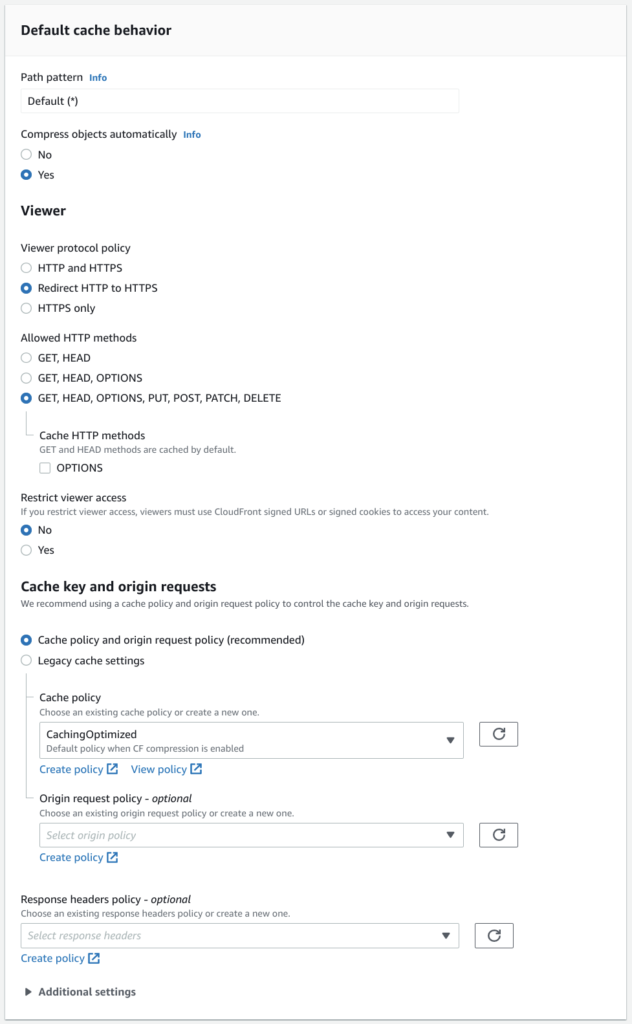
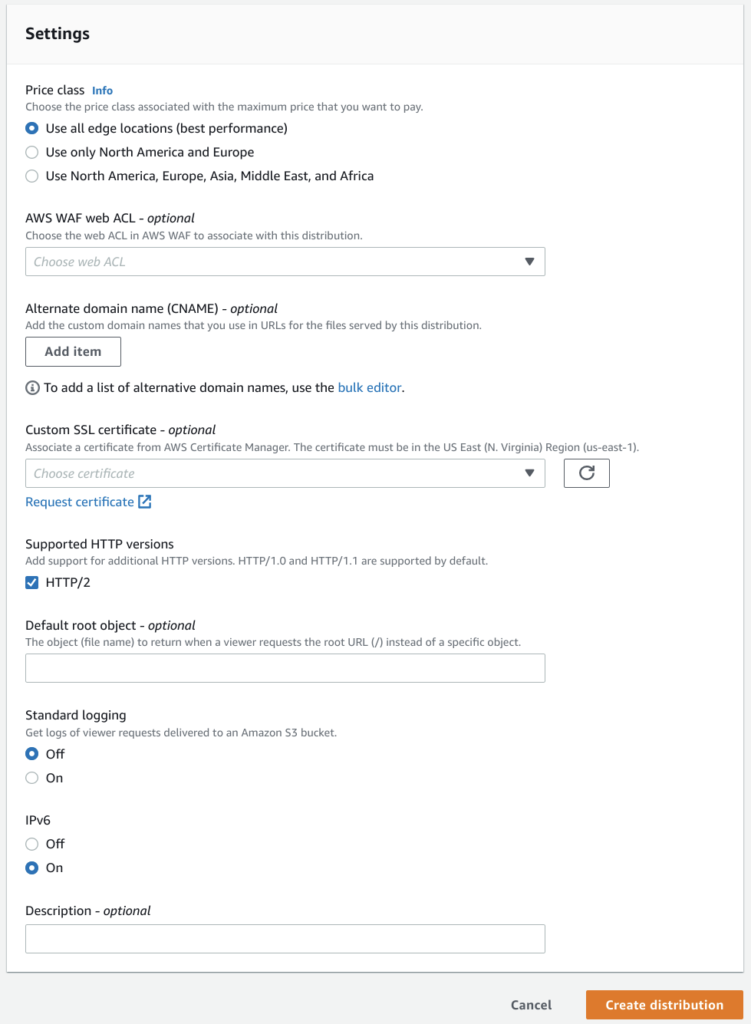
My configuration is here.
You can easily delete and create again, so be relaxed.
Initially GET/HEAD is allowed.
In WordPress POST or other method should be used, so I configured to allow all HTTP methods.
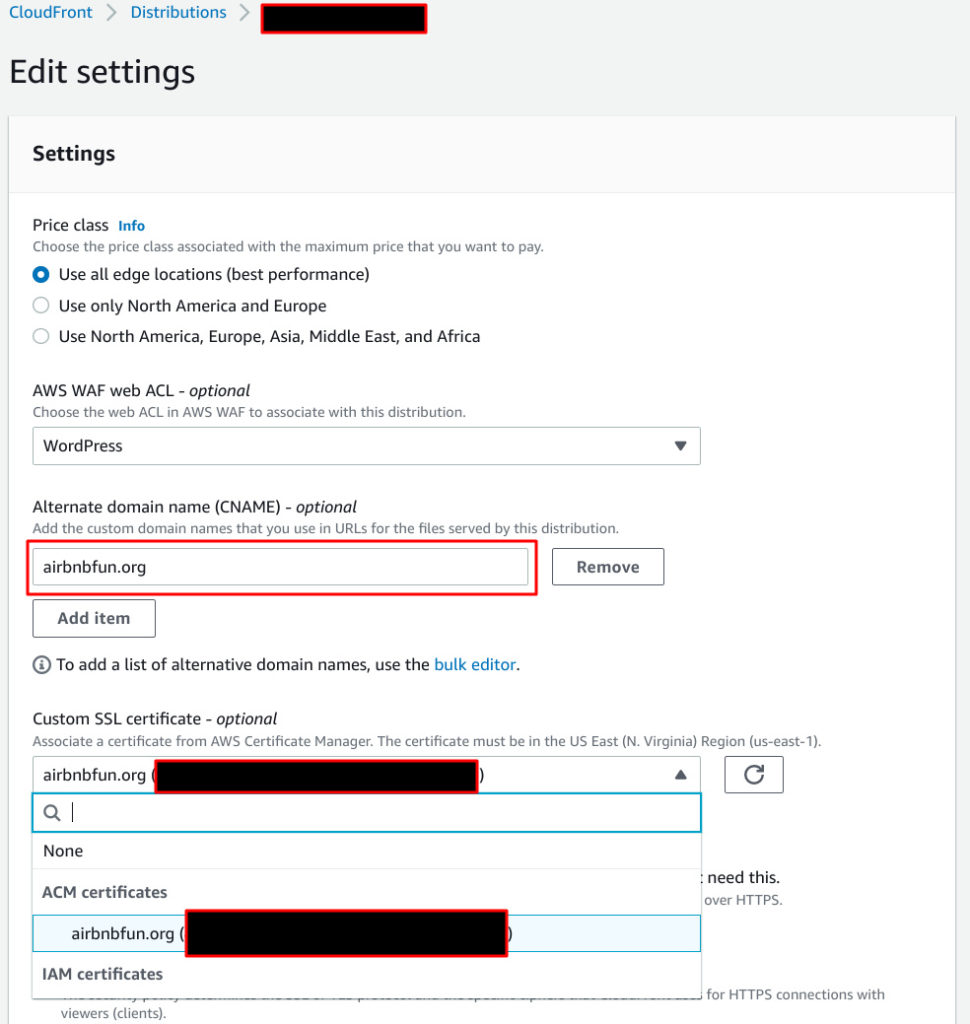
To be able to access by HTTPS you need to configure Alternate domain name and Custom SSL certificate but perhaps you don’t have yet.
They will be configured later.
Distribution is created.
Then you need to add some headers in Behaviors.
Host is needed because trick target server “Hey, I am accessing airbnbfun.org not origin.airbnbfun.org”.
And CloudFront-Forwarded-Proto is original header which is used only by CloudFront.
Then add a few code to wp-config.php of WordPress to recognize CloudFront-Forwarded-Proto header like this.
 if (!empty($_SERVER['HTTP_X_FORWARDED_PROTO']) && $_SERVER['HTTP_X_FORWARDED_PROTO'] === 'https') {
         $_SERVER['HTTPS'] = 'on';
+} elseif (!empty( $_SERVER['HTTP_CLOUDFRONT_FORWARDED_PROTO']) && $_SERVER['HTTP_CLOUDFRONT_FORWARDED_PROTO'] === 'https') {
+        $_SERVER['HTTPS'] = 'on';
 }
Navigate to CloudFront when browser inputs target URL
Next is to navigate visitor to CloudFront when he/she/it inputs URL airbnbfun.org
To do it we need to do 2 things.
- Configure Route53
- Forward DNS request to Route53
Configure Route53
Please configure like this.
They are what I did.
- Create airbnbfun.org host zone
- Configure A record of airbnbfun.org to what is alias of CloudFront host name
(CNAME record is used later, so let's skip now)
- Configure A record of origin.airbnbfun.org to IP address of Raspberry Pi
Now your Route53 can process DNS request for airbnbfun.org.
Forward DNS request to Route53
Next step is to configure conventional DNS server to forward to Route53.
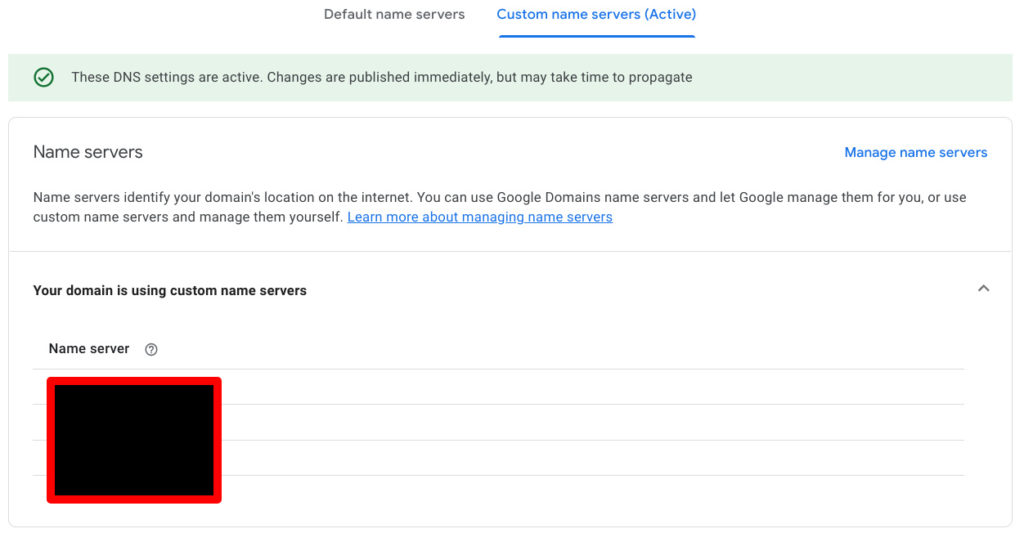
In my case I bought airbnbfun.org from Google Domains, so I configured Google Domains.
Each domain name servers are copied from Route53.
Now this flow is able to be performed when visitor inputs airbnbfun.org.
Visitor inputs https://airbnbfun.org
 - Browser asks Google Domains which is DNS server of airbnbfun.org
 - Google Domains replies "Please ask Route53"
 - Browser asks Route53
 - Route53 replies CloudFront host name
 - Browser asks DNS server of CloudFront(itself?) for CloudFront host name
 - Browser gets IP address of CloudFront
 - Browser intends to communicate HTTPS communication to CloudFront
Assign SSL certificate to CloudFront
Create SSL certificate
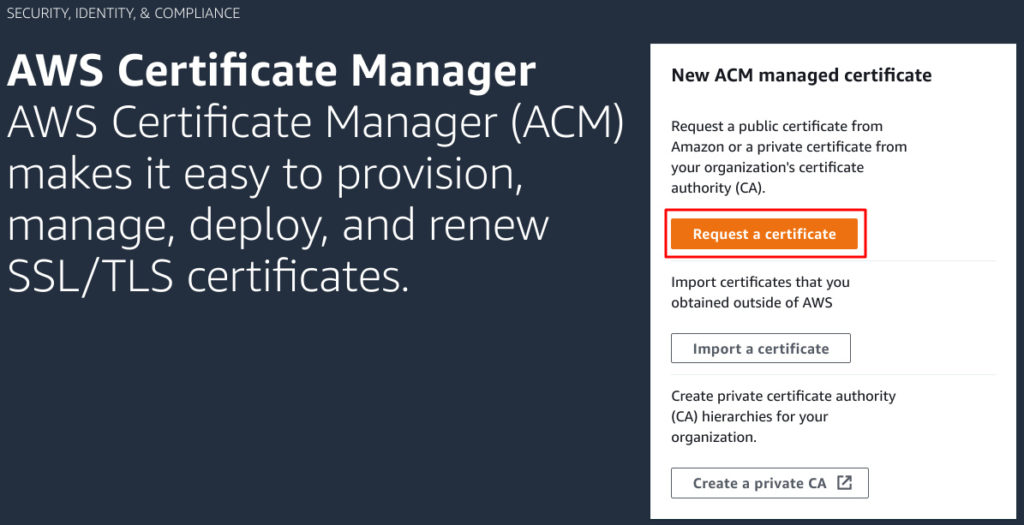
You can easily create SSL certificate by using ACM which is included AWS.
Request a certificate.
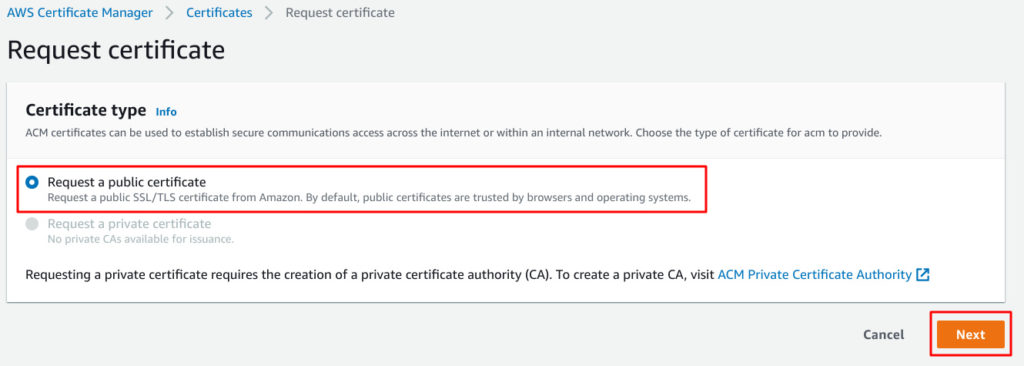
Request a public certificate and Next.
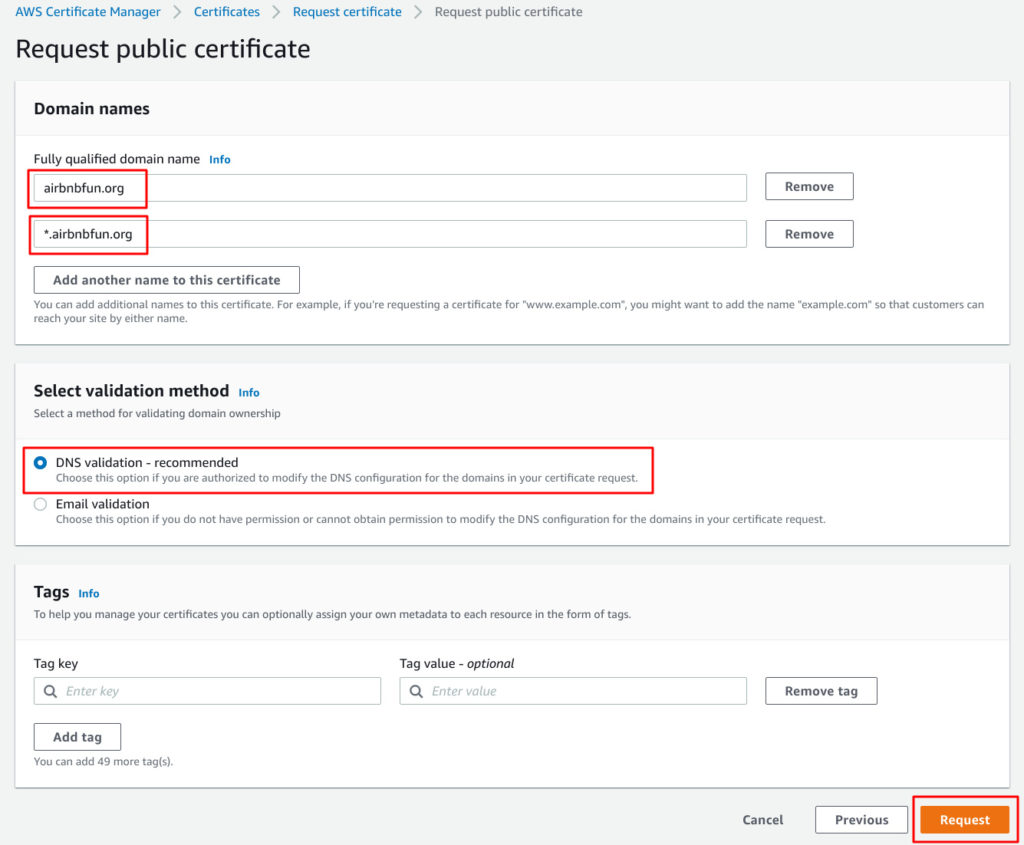
Input information to be configured.
You need to include 2 domains.
– airbnbfun.org
– *.airbnbfun.org
I would recommend DNS validation because this is easy to perform.
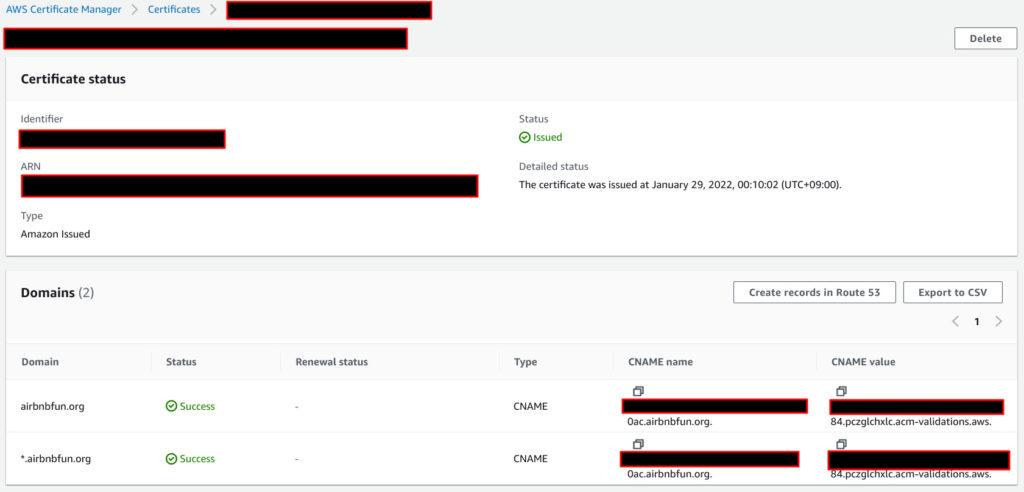
Certificate is created.
You can notice CNAME record is there.
Please create CNAME record in Route53 with CNAME name/value shown in above picture like this.
– Please refer black rectangle.
After a few minutes certificate will be verified by CNAME and available.
Assign SSL certificate to CloudFront
Please go to CloudFront distribution configuration and do followings.
– Input airbnbfun.org to Alternate domain name (CNAME).
– Select proper certificate which you created just now.
Smoke test
Now your CloudFront should work well.
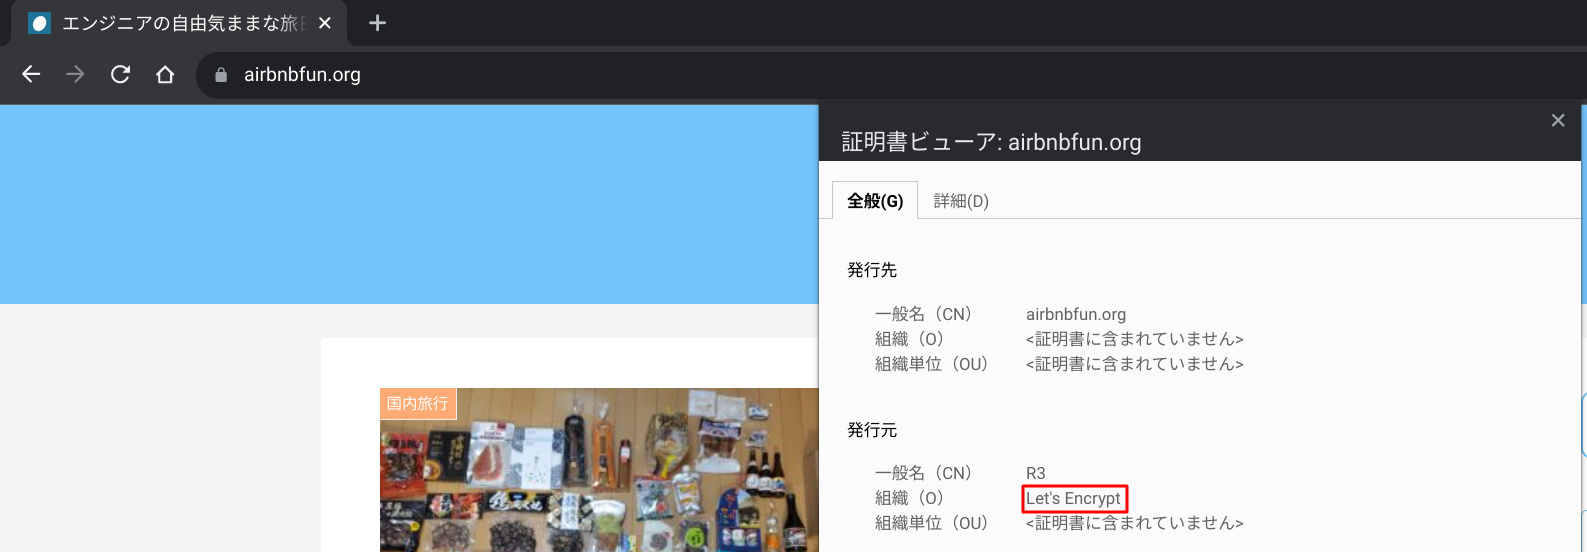
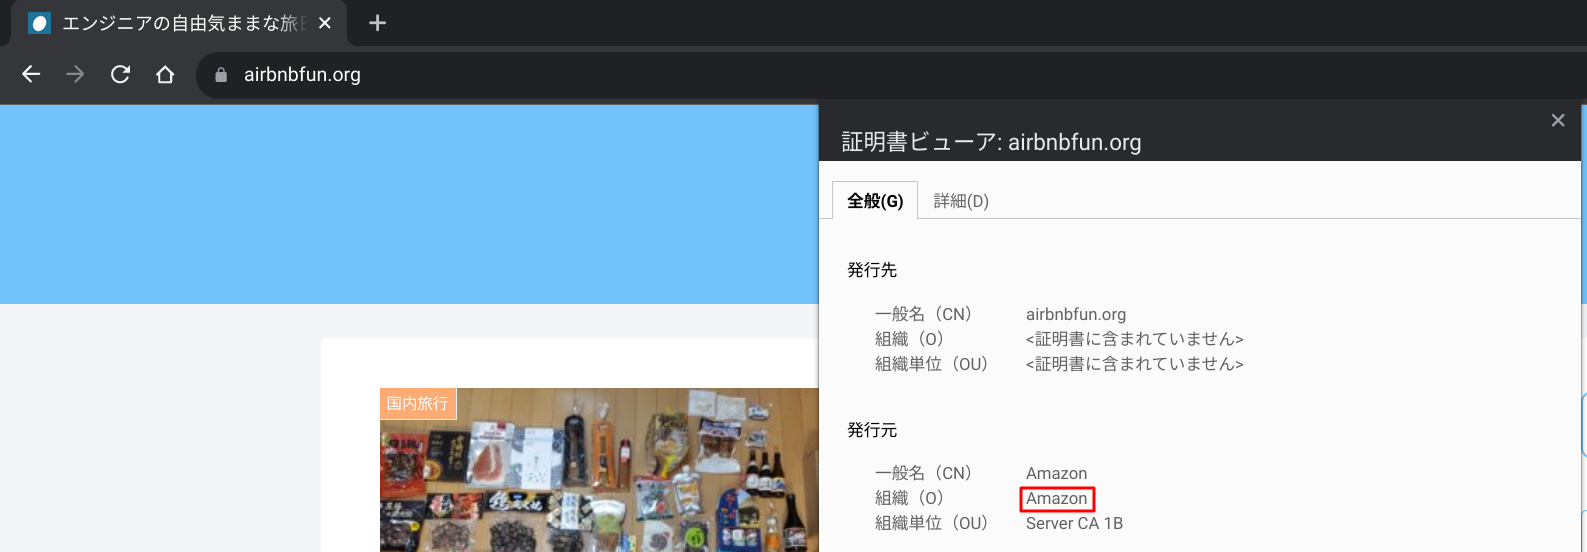
Let’s access your target server and confirm SSL certificate is issued from ACM.
Before
– Certificate is issued by Let’s Encrypt.
After
– Certificate is issued by Amazon.
Conclusion
How was it?
I should perform benchmarking to compare performance!







Comments