Let’s get continue from this post which I installed CloudFront in front of Raspberry Pi 4.
In this post I will setup AWS WAF to CloudFront.
CloudFront is high function cache server made by AWS.
Then we can attach AWS WAF which is AWS’s Web Application Firewall.
AWS WAF is rule based WAF so it can be categorized the same group as ModSecurity.
– Actual rules may be different.
On the other hand AWS also has GuardDuty which is machine learning based WAF which can detect unknown attacks by using know-how of Amazon.
I want to try afterwards.
Monthly fee of AWS WAF
Here is table of price.

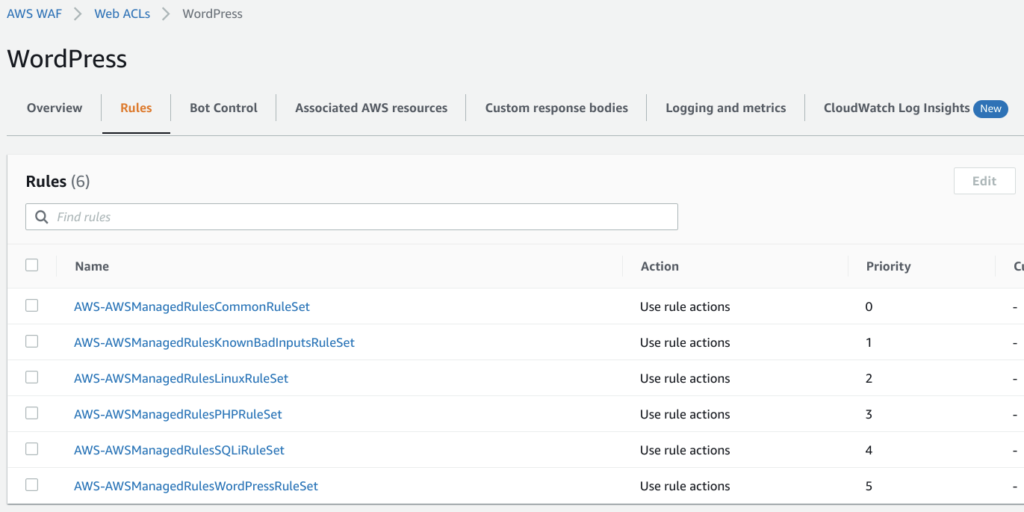
I tried these sets.
– 1 Web ACL
– 6 Rules
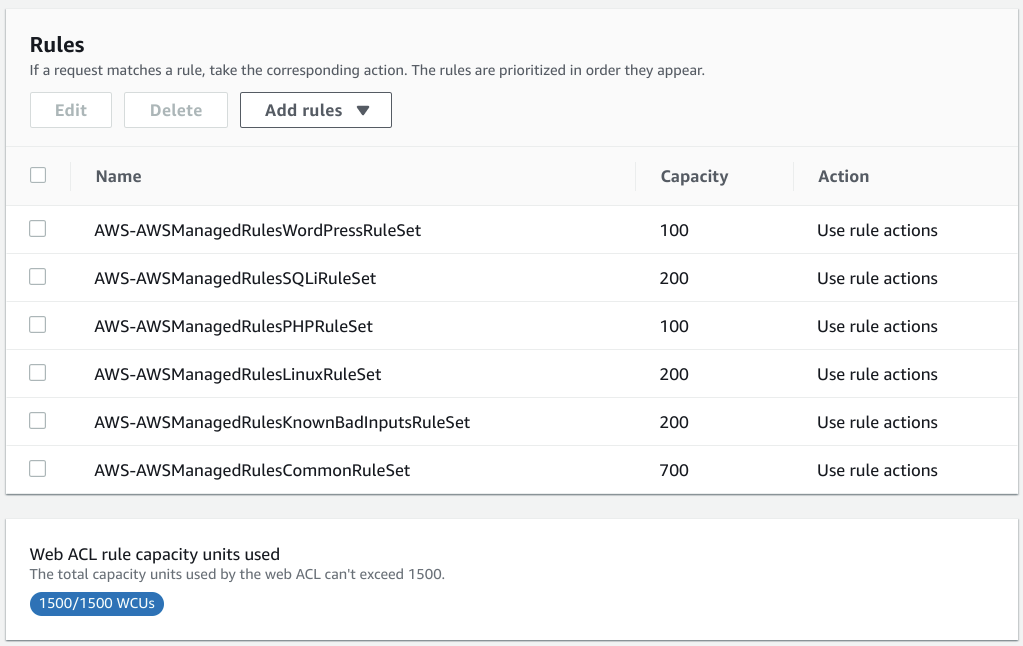
As shown below I newly created ACL named WordPress and added 6 rules in it.
I kind of selected rules which seems to be relevant to WordPress.
Assume total access is 50000 requests then price for 1 month will be below.
– Requests isn’t PV
- 5USD x 1 ACL = 5USD
- 1USD x 6 Rules = 6USD
- 0.60USD x (50000/1000000) = 0.03USD

Total 11.03USD
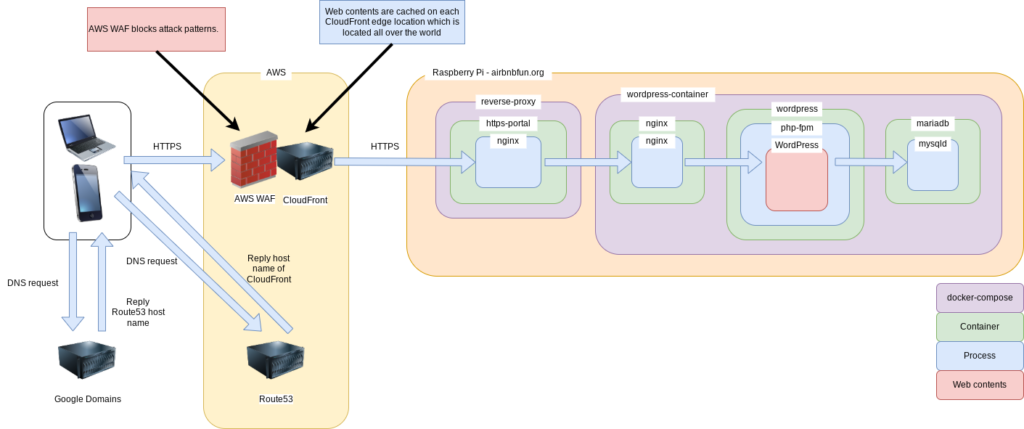
System architecture
Before
After
AWS WAF is attached to CloudFront then it blocks attacks before reaching contents server.
Pros
We can add WAF function without touching contents server.
If you choose ModSecurity you need to mind them.
- Announce what service will perform some maintenance for some time
- Stop service
- Install ModSecurity to Apache/Nginx as module and activate
- Start service
- Annouce that server maintenance is finished
You also need to think about negative impact because for some period service completely stops so customer cannot use your service.
In case of AWS WAF you only need to attach to CloudFront.
You don’t need to touch contents server.
Cons
As mentioned earlier , additional cost will come.
And, you may need to pay more if you want to use rules because some rules aren’t free.
For example you can find Paid rule groups on rule management view.

If you want to protect stronger then you might need to apply more rules then need to pay more money than expected.
So you need to consider which rules are really needed for your service.
How to install
AWS WAF
Please go to AWS WAF.
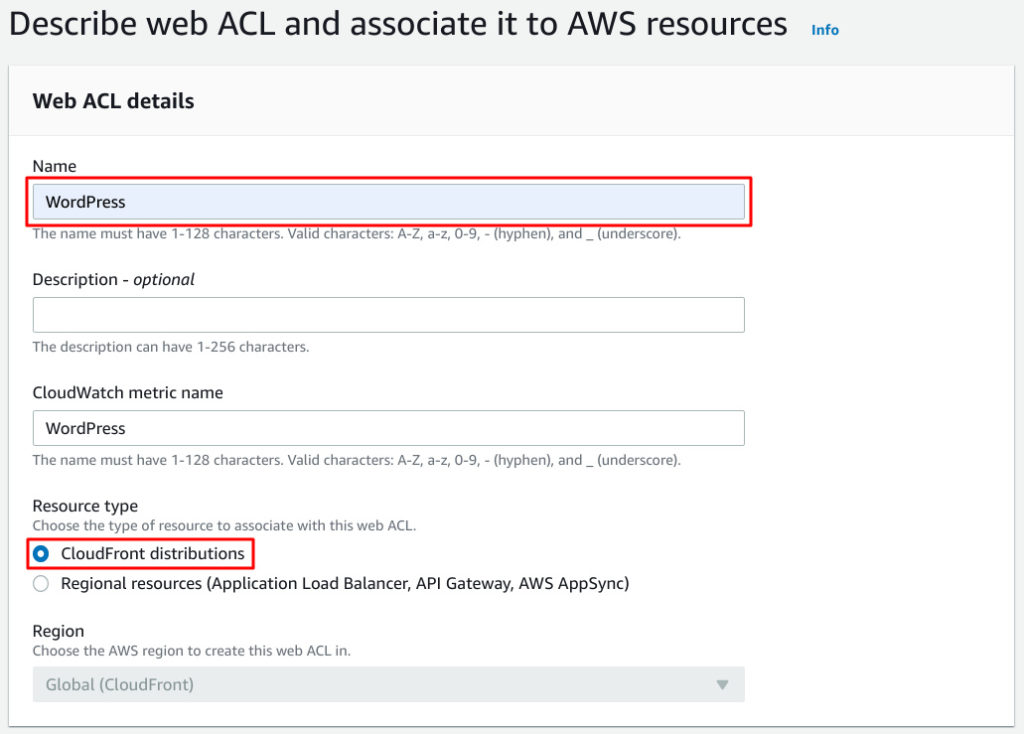
Create web ACL.

Resource type should be CloudFront distributions because you want to attach to CloudFront.
Name is as you want.
Add AWS resources to link CloudFront distribution.

Choose your CloudFront distribution and Add.
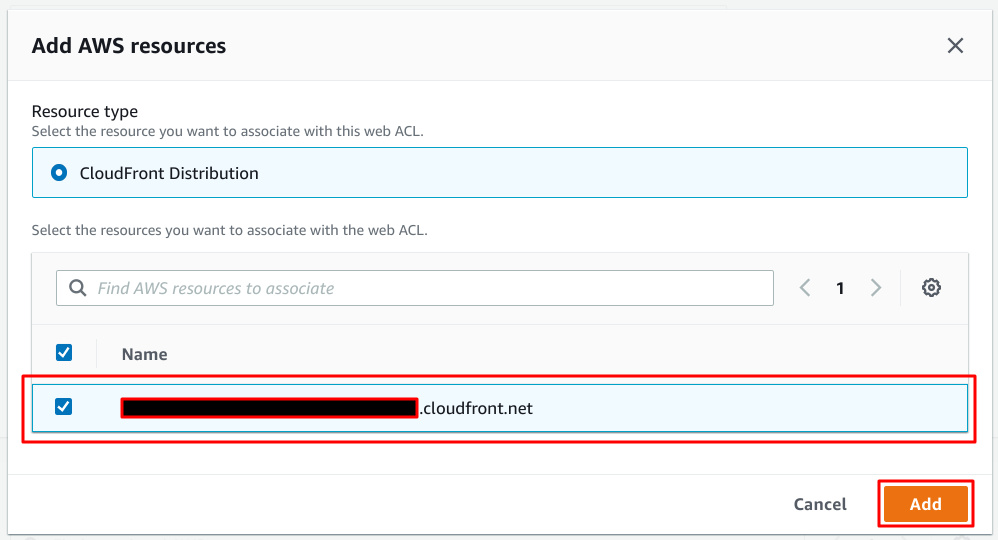
You will see your distribution and Next.

You need to add rules to it.
Add rules.
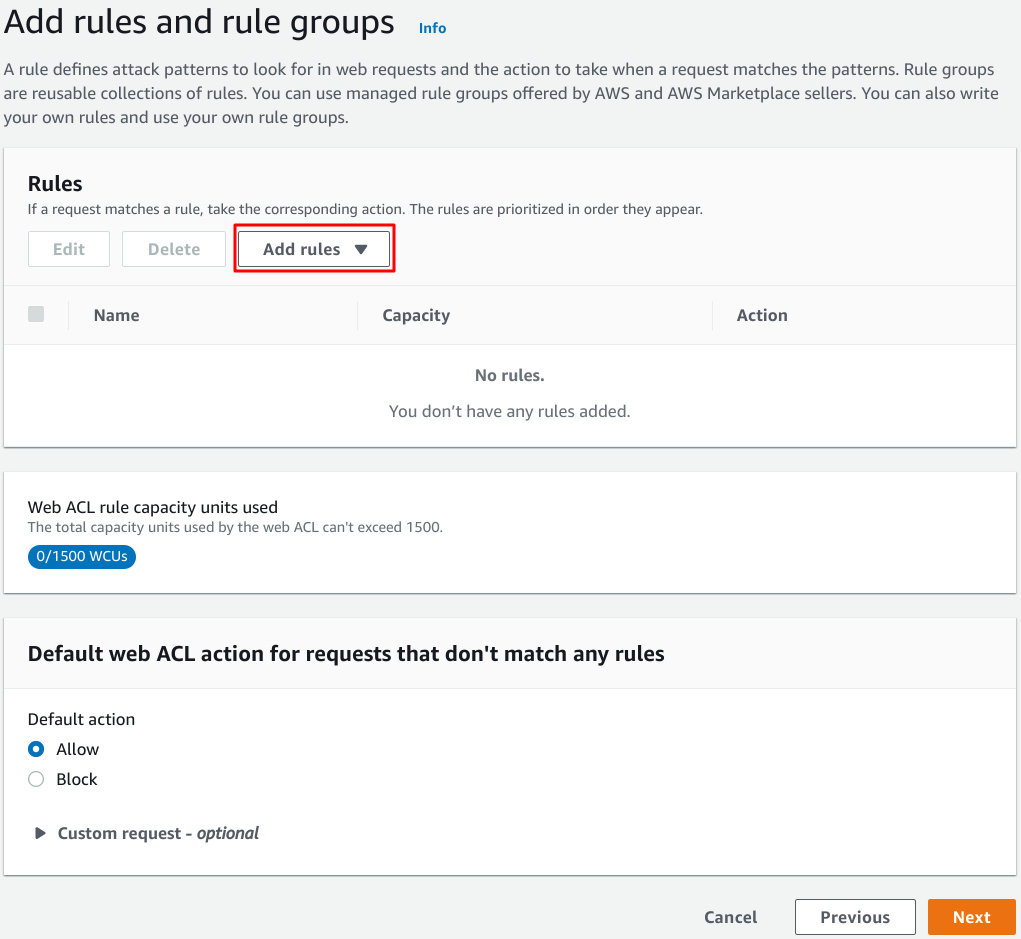
In this case I will select pre defined rules.
Add managed rule groups.
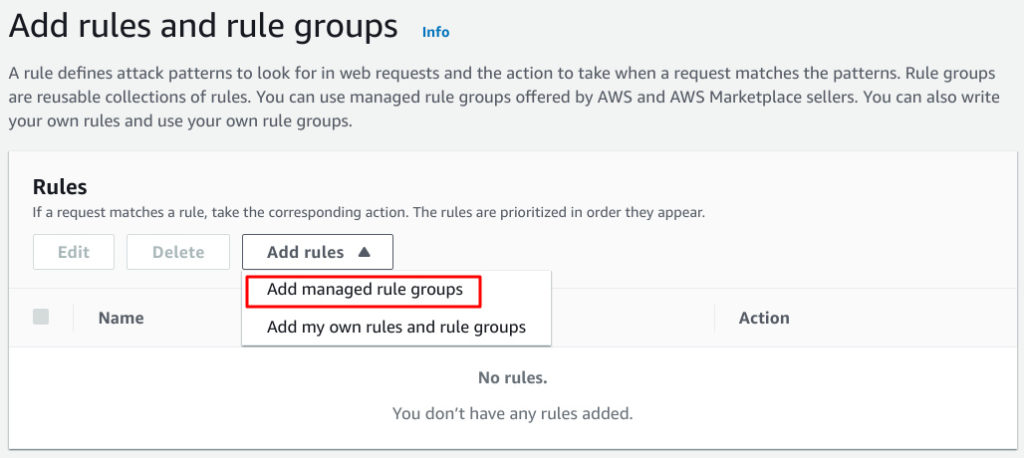
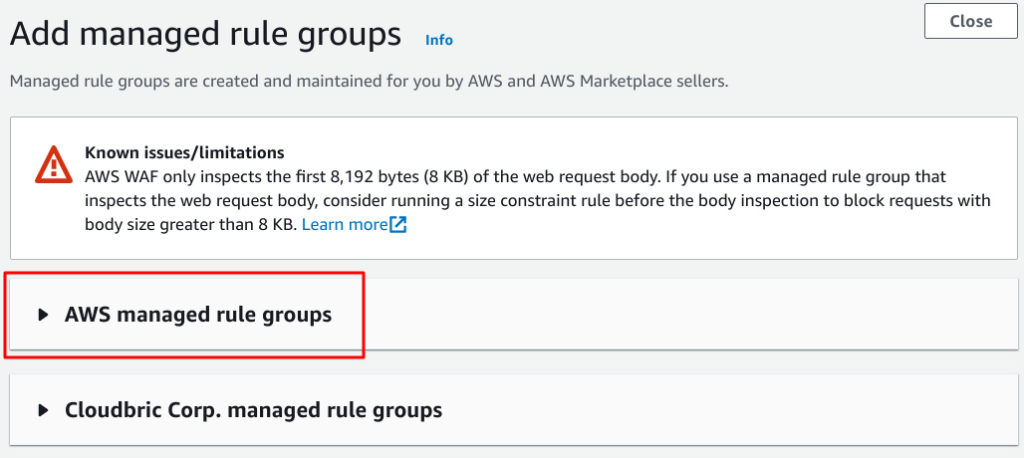
You can view pre defined rules provided by AWS by clicking AWS managed rule groups.
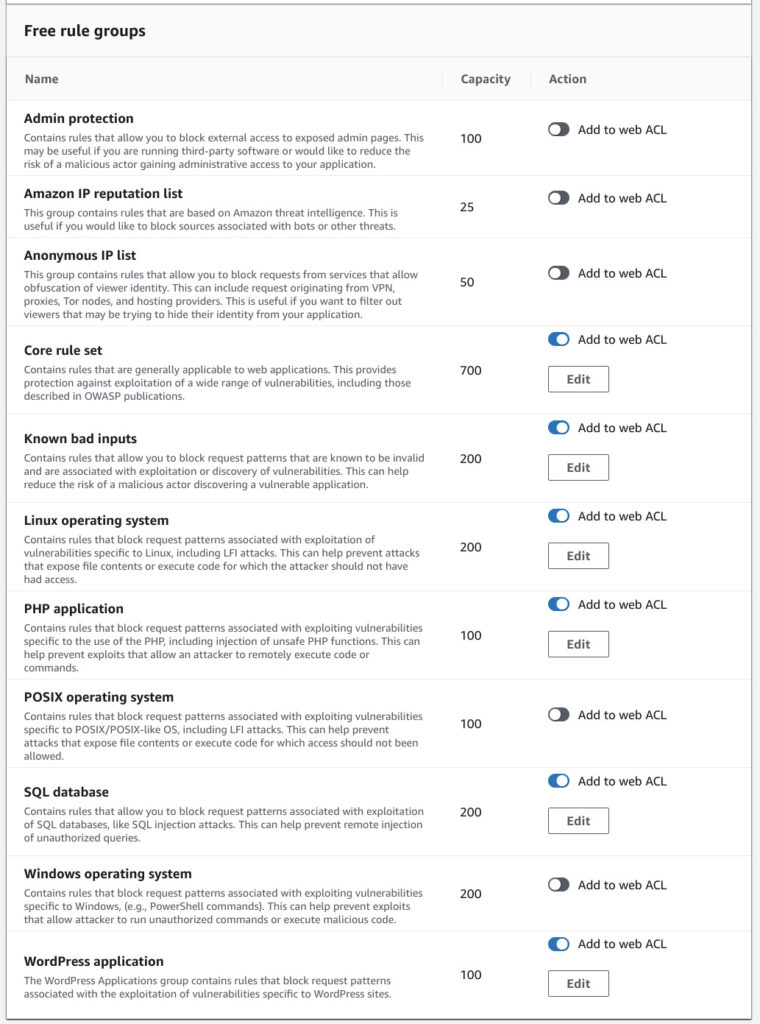
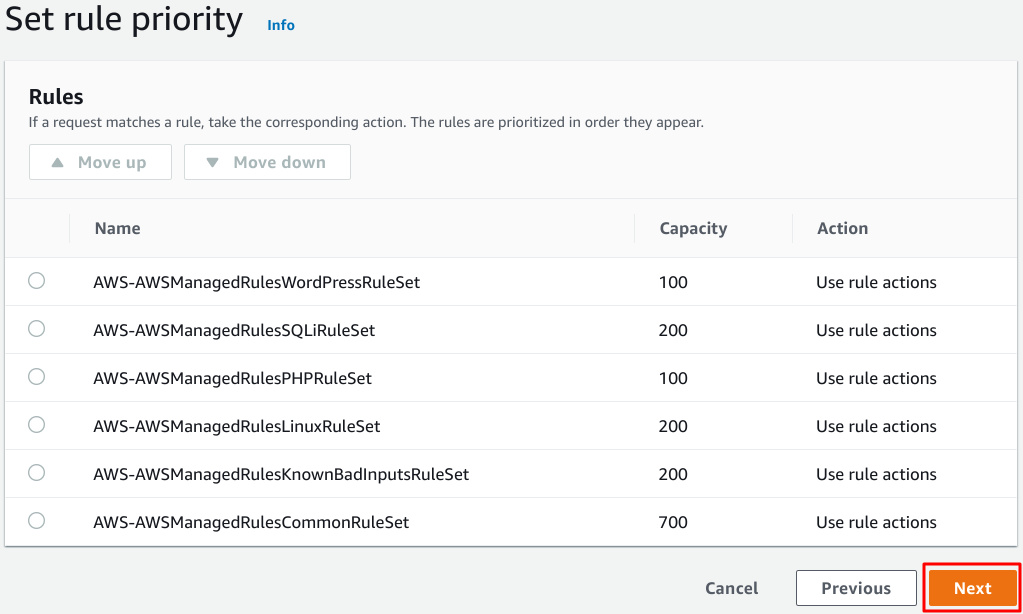
In my contract budget is 1500WCUs.
I select as many as possible.
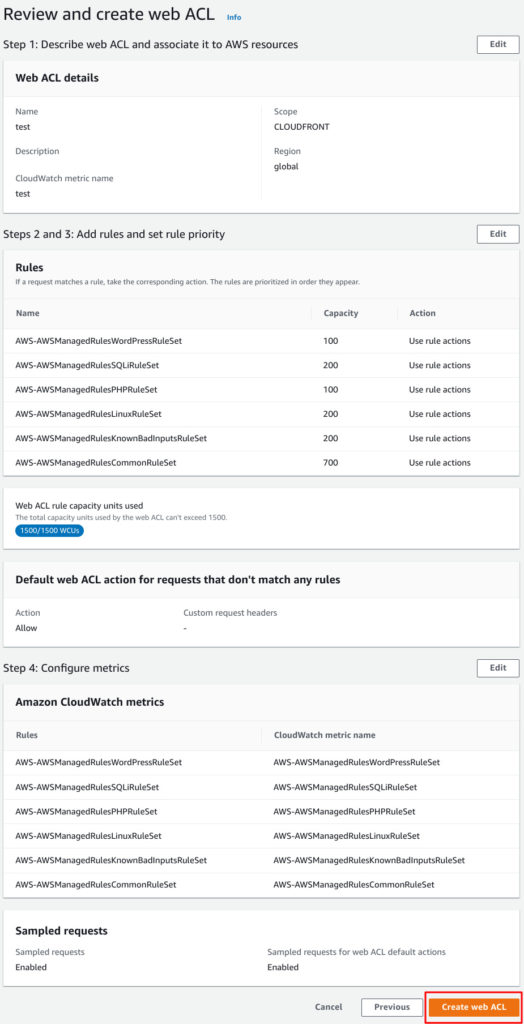
This combination used 1500WCUs sharp.
Next page is to set priority between each rules.
I didn’t do anything and Next.
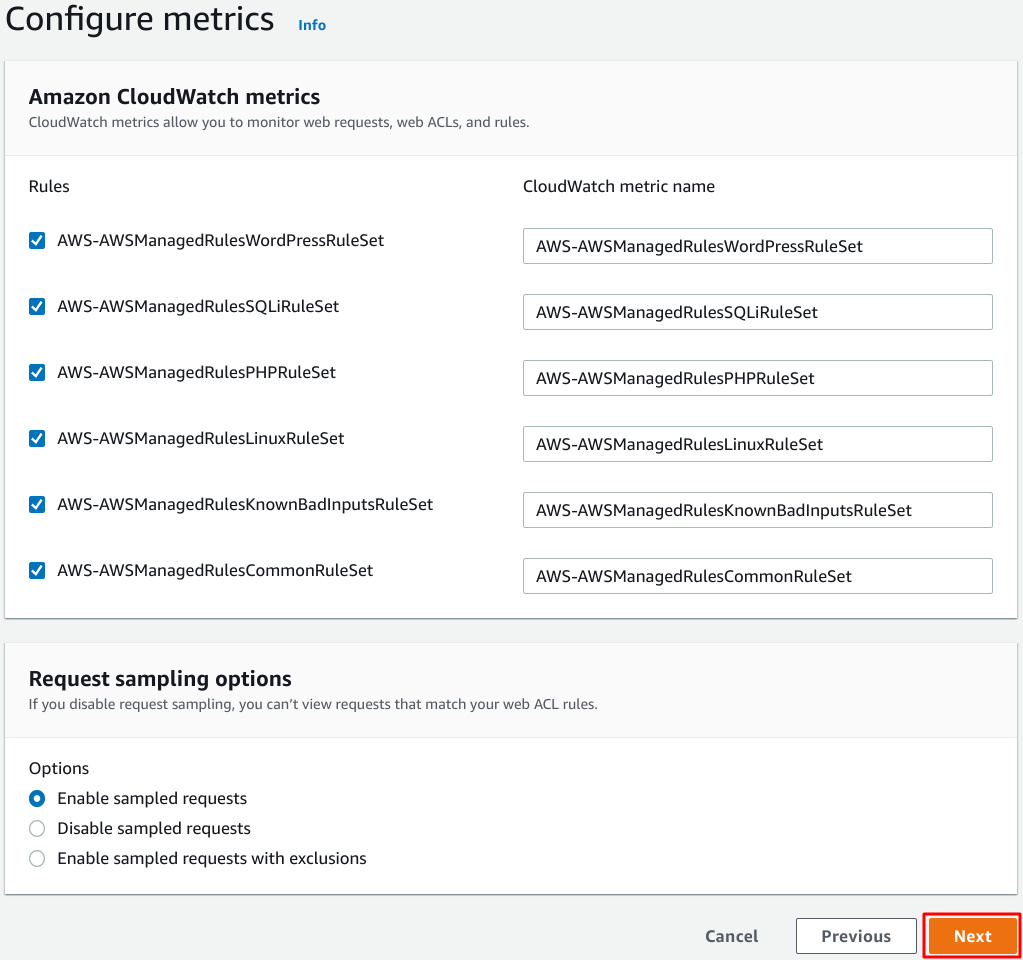
In Configure metrics, I didn’t do anything and Next.
Review settings.
If no problems you can click Create web ACL.
ACL is successfully created.

CloudFront configuration
Next steps is to configure CloudFront to use Web ACL you created just now.
Go to your distribution, go to General tab and Edit.
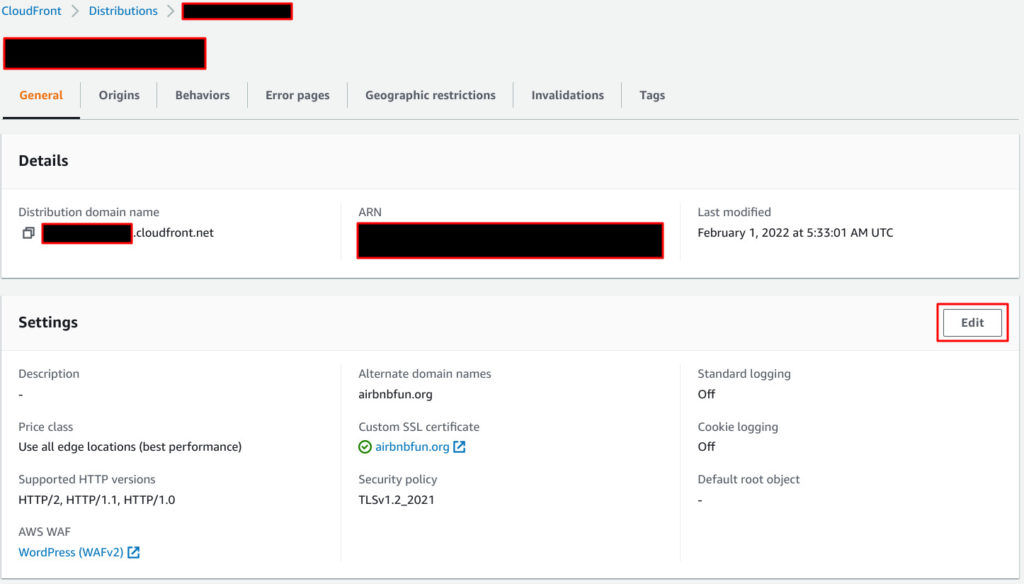
You will see your Web ACL.
Select this.
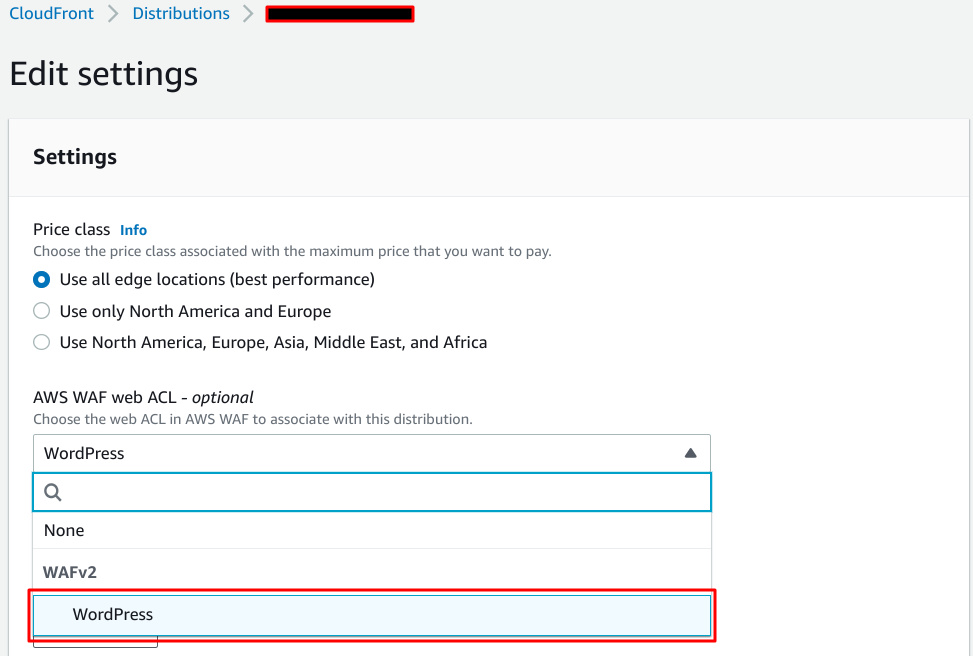
That’s all when you save this change.
Smoke test
I coundn’t actual behavior for detail, but I tested by below steps.
I accessed https://airbnbfun.org/xmlrpc.php which is famous attack, then I found WAF rejected this access like below.
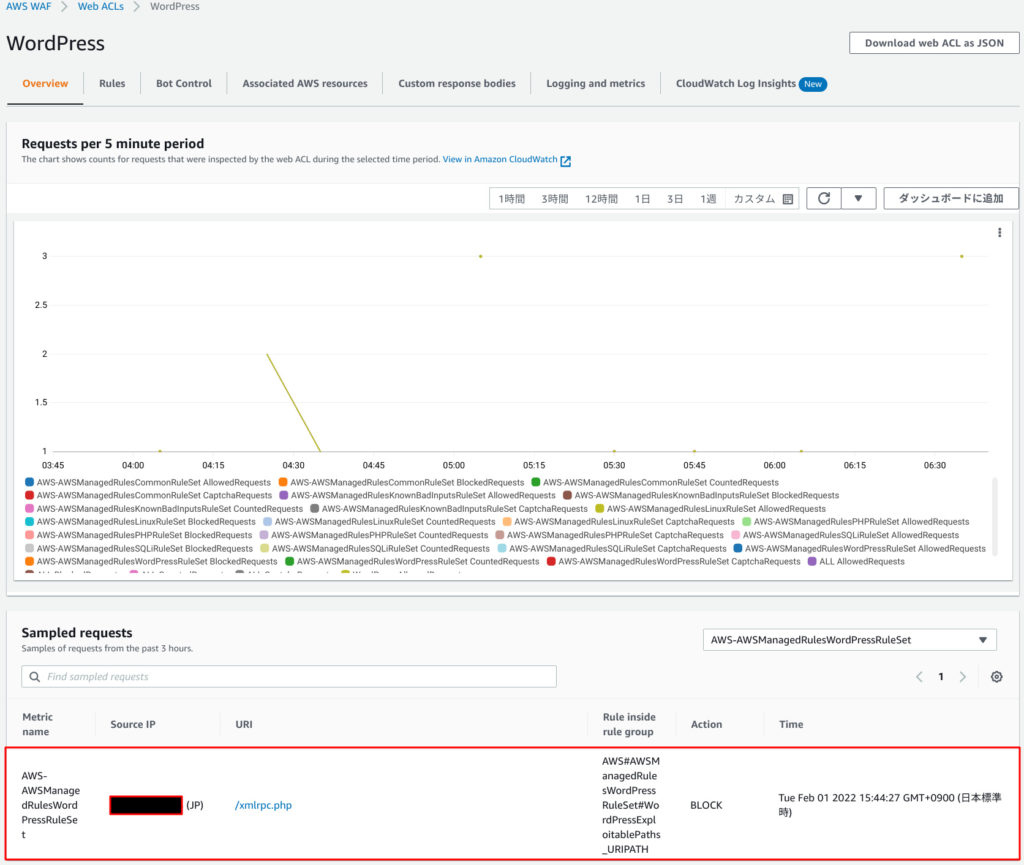
My smartphone shows HTTP 403 which means “Your request was rejected”.

Conclusion
How was it?
Of course you need to do review which rules to be configured for your service!
Good luck!




Comments