I have installed clamonacc on Orange Pi 5 Plus.
It notifies virus alert by LINE(SNS used mainly in Asian) like this.
– Before this by email.

Please have a look this article for more detail about clamonacc.
Now the latest version is 1.2.0.
This article will summerize how to build and install.
Preparing build environment
Current clamav needs rust for build.

Installing needed packages.
$ sudo apt update && apt install -y \
  `# install tools` \
  gcc make pkg-config python3 python3-pip python3-pytest valgrind \
  `# install clamav dependencies` \
  check libbz2-dev libcurl4-openssl-dev libjson-c-dev libmilter-dev \
  libncurses5-dev libpcre2-dev libssl-dev libxml2-dev zlib1g-dev \
  cmake
In official page we need to install python-pytest.
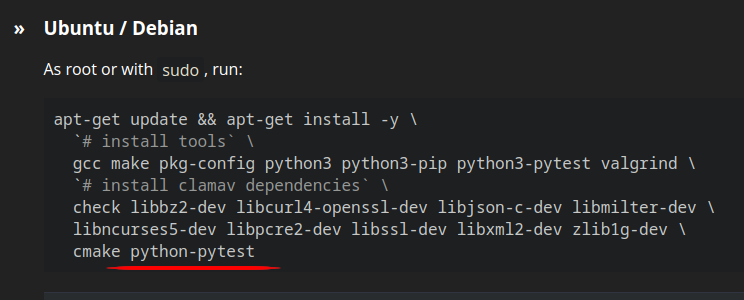
I couldn’t install, but it was no problem.
– May be due to Orange Pi 5 Plus which refers another repository?

Next, installing rust.
We can refer this page.

You can easily install by running below command.
– Under /home/<username>/ directory.
$ curl --proto '=https' --tlsv1.2 -sSf https://sh.rustup.rs | sh
Download clamav source code
We can download by git clone or downloading from Release.
git clone
$ git clone -b clamav-1.2.0 https://github.com/Cisco-Talos/clamav.git
$ cd clamav
Downloading from Release.
$ wget https://www.clamav.net/downloads/production/clamav-1.2.0.tar.gz
$ tar zxf clamav-1.2.0.tar.gz
$ cd clamav-1.2.0
Next let’s do build install.
It took less than 30 minutes.
$ mkdir build
$ cd build
$ cmake ..
$ cmake --build .
$ ctest
$ sudo cmake --build . --target install
We can refer install_manifest.txt for installed files.
$ cat install_manifest.txt
/usr/local/bin/clamav-config
/usr/local/lib/pkgconfig/libclamav.pc
/usr/local/lib/libclamunrar.so.12.0.1
/usr/local/lib/libclamunrar.so.12
/usr/local/lib/libclamunrar.so
/usr/local/lib/libclamunrar_iface.so.12.0.1
/usr/local/lib/libclamunrar_iface.so.12
/usr/local/lib/libclamunrar_iface.so
/usr/local/lib/libclammspack.so.0.8.0
/usr/local/lib/libclammspack.so.0
/usr/local/lib/libclammspack.so
/usr/local/lib/libclamav.so.12.0.1
/usr/local/lib/libclamav.so.12
/usr/local/lib/libclamav.so
/usr/local/include/clamav.h
/usr/local/include/clamav-types.h
/usr/local/include/clamav-version.h
/usr/local/lib/libfreshclam.so.3.0.1
/usr/local/lib/libfreshclam.so.3
/usr/local/lib/libfreshclam.so
/usr/local/include/libfreshclam.h
/usr/local/bin/clamconf
/usr/local/sbin/clamd
/usr/local/bin/clamdscan
/usr/local/sbin/clamonacc
/usr/local/sbin/clamav-milter
/usr/local/bin/clamscan
/usr/local/bin/sigtool
/usr/local/bin/clambc
/usr/local/bin/clamsubmit
/usr/local/bin/freshclam
/usr/local/bin/clamdtop
/usr/local/etc/clamd.conf.sample
/usr/local/etc/freshclam.conf.sample
/usr/local/etc/clamav-milter.conf.sample
/usr/local/share/man/man1/clamscan.1
/usr/local/share/man/man1/freshclam.1
/usr/local/share/man/man1/sigtool.1
/usr/local/share/man/man1/clamdscan.1
/usr/local/share/man/man1/clamconf.1
/usr/local/share/man/man1/clamdtop.1
/usr/local/share/man/man1/clamsubmit.1
/usr/local/share/man/man1/clambc.1
/usr/local/share/man/man5/clamd.conf.5
/usr/local/share/man/man5/clamav-milter.conf.5
/usr/local/share/man/man5/freshclam.conf.5
/usr/local/share/man/man8/clamd.8
/usr/local/share/man/man8/clamav-milter.8
You can uninstall by running below command.
$ sudo xargs rm < install_manifest.txt
Automatic start after boot
This is script for start.
$ cat /usr/local/bin/start_clamonacc.sh
#!/bin/bash

CLAMONACC=/usr/local/sbin/clamonacc
QUARANTINE_DIR=/opt/clamav/quarantine

${CLAMONACC} --config-file=/usr/local/etc/clamonacc.conf --ping 3 > /dev/null
if [ 0 -ne $? ]; then
	echo "clamd doesn't exist. exiting..."
	exit 1;
else
	echo "Good, clamd exists."
fi

if [ ! -d ${QUARANTINE_DIR} ]; then
	mkdir -p ${QUARANTINE_DIR}
fi

${CLAMONACC} --fdpass --move=${QUARANTINE_DIR} --config-file=/usr/local/etc/clamonacc.conf
My clamonacc.conf is below.
$ cat /usr/local/etc/clamonacc.conf
TCPSocket 1234
TCPAddr 192.168.1.123
OnAccessIncludePath /media/
OnAccessVirusEvent curl -X POST -H "Authorization: Bearer xxxxxxxxxxxxxxxxxxxxxxxxxxxxxxxxxxxxxxxxxxx" -F "message=${CLAM_VIRUSEVENT_VIRUSNAME} is found in ${CLAM_VIRUSEVENT_FILENAME} on $(cat /etc/hostname)." https://notify-api.line.me/api/notify
| Item | Value |
| TCPSocket | Port number which clamd runs |
| TCPAddr | IP address which clamd runs |
| OnAccessIncludePath | Directory which you want clamonacc to watch |
| OnAccessVirusEvent | Command line which you want clamonacc to run when virus is found |
You can refer this article to know how to setup clamd.
3/28/2024
In my environment this error was observed during startup of clamonacc.
no space left on device
This was caused by limitation of file descriptor count which 1 process can open.
I resolved by this.
vim /etc/sysctl.conf

# Added below
s.inotify.max_user_watches=524288
Behavior when detecting viruses
I implemented OnAccessVirusEvent event by myself to be able to run command on computer on which clamonacc runs.
I use this LINE Notify service to post any messages by Rest API.
It’s very easy handling and useful.

This is my command line.
We can use curl it’s nice!
curl -X POST -H "Authorization: Bearer xxxxxxxxxxxxxxxxxxxxxxxxxxxxxxxxxxxxxxxxxxx" -F "message=${CLAM_VIRUSEVENT_VIRUSNAME} is found in ${CLAM_VIRUSEVENT_FILENAME} on $(cat /etc/hostname)." https://notify-api.line.me/api/notify
You need to specify “XXX…” as you Personal Access Token, which needs to be obtained by logging in your personal LINE account.
Conclusion
How was it?
It’s very nice to be able to use Raspberry Pi know-how!


Comments