
In the below article, OS installation to microSD for Raspberry Pi is performed with dd command.
On the other hand, OS installation to microSD itself can also be done with the GUI application named “Imager”.
Let me introduce how to use Imager.
So even if you are not familiar with LInux command you flash OS image to microSD.
I performed in Windows 10.
If you want to see how to do on Linux like Ubuntu, it will be introduced in another atricle.
Please wait!
Downloading and installing Imager on Windows10
You can download it from the official website.
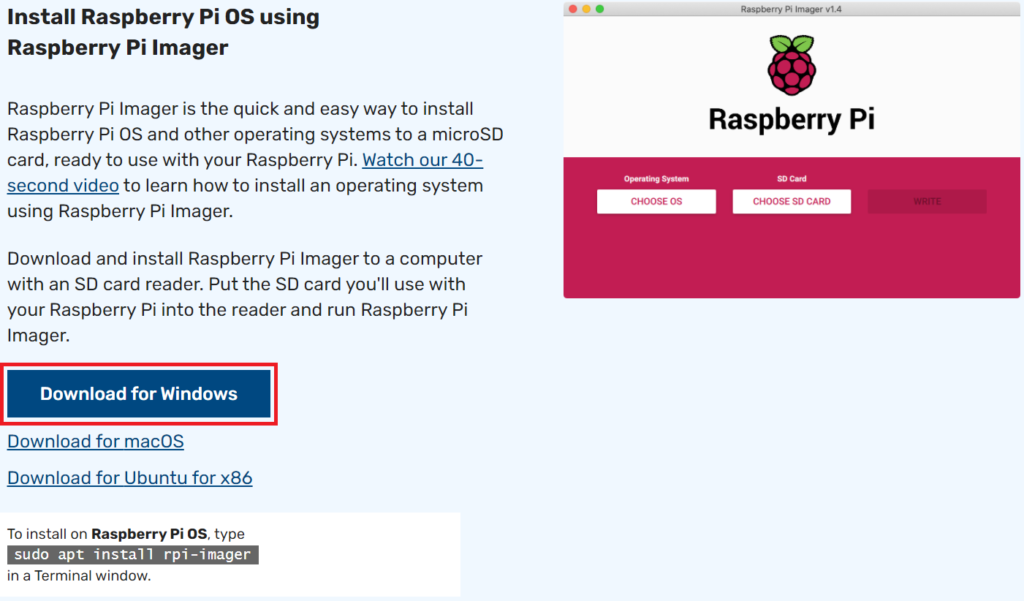
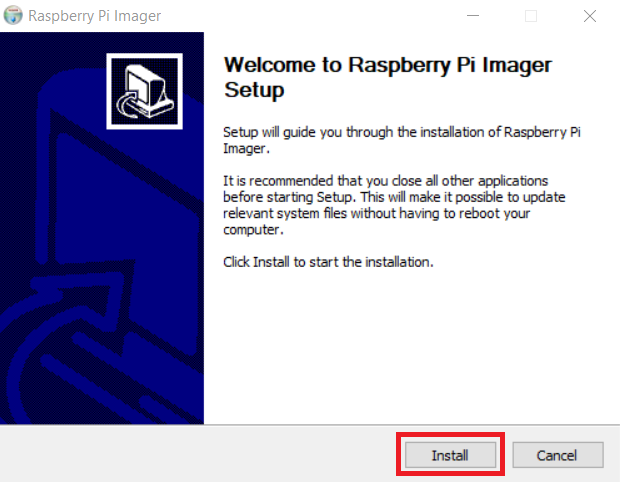
Just like other app, you can install it with the installer.
Writing OS image to microSD
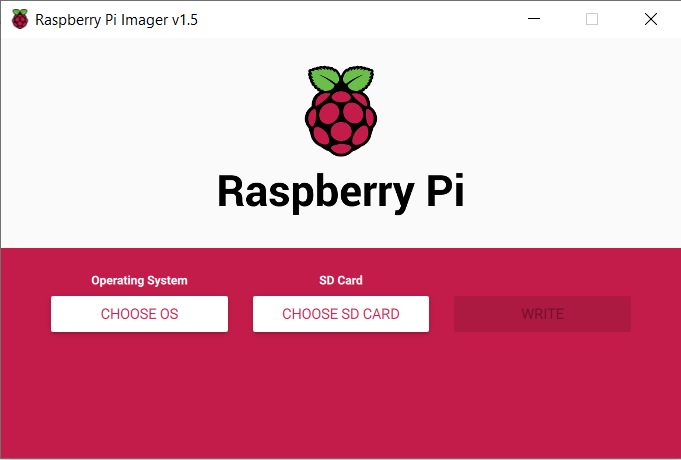
You can launch Imager just like a other app.
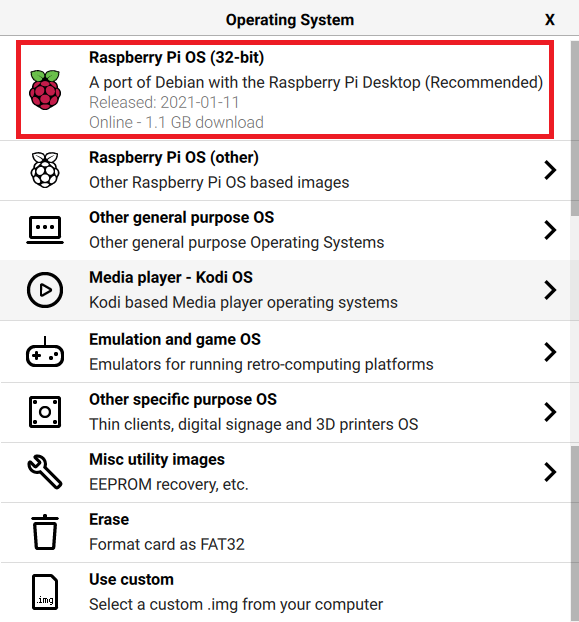
Select CHOOSE OS and specify which OS image you want to write.
The applicable OS is displayed in a list shown below.
You can also choose img file which you downloaded from somewhere.
In this article, let’s do it with Raspberry Pi OS (32-bit) at the top.
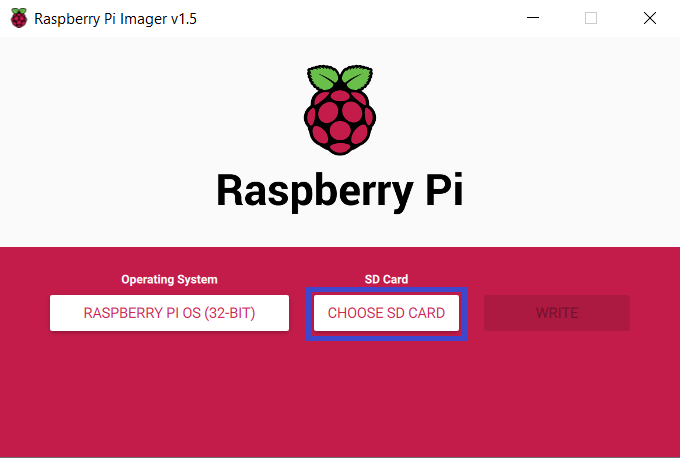
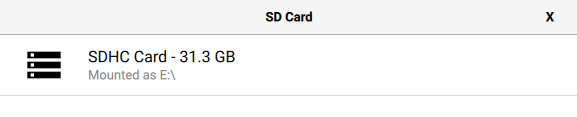
Next, choose a CHOOSE SD CARD and choose target microSD.
The USB memory adapter seemed to be not supported.
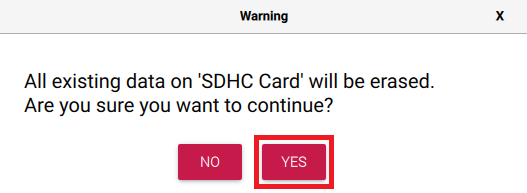
Write starts when you click WRITE.
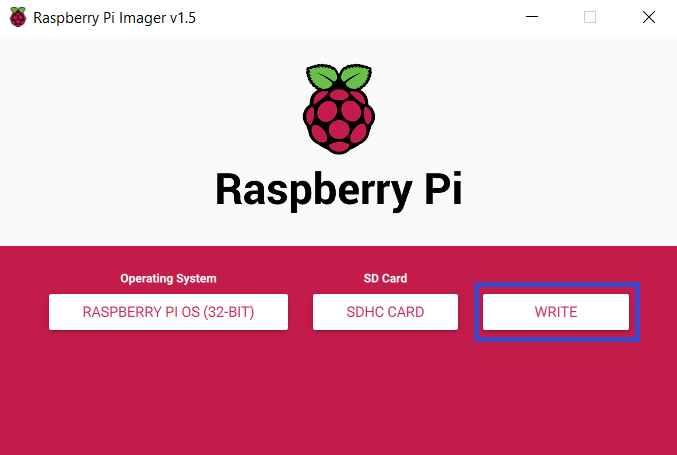
You are asked “Are you sure you want to write? All data in microSD will be deleted.”
Press YES.
Oops… OS image could not be downloaded in my environment.
– 3 times tried, 3 times failed.
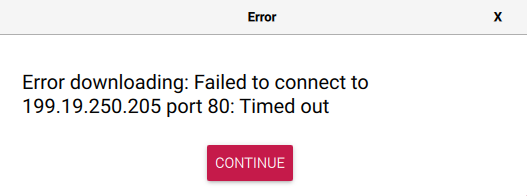
So, I downloaded the OS image file from the official site.
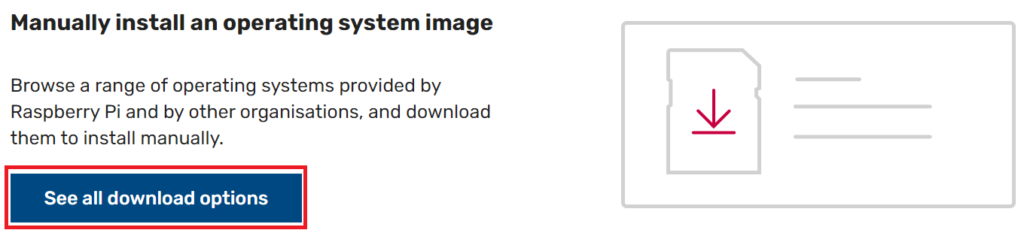
You can go download page by clicking See all download options in Manual install an operating system image section.
There are 3 options of Raspberry Pi OS.
You can choose any of them, but if you are a beginner, the top is recommended.
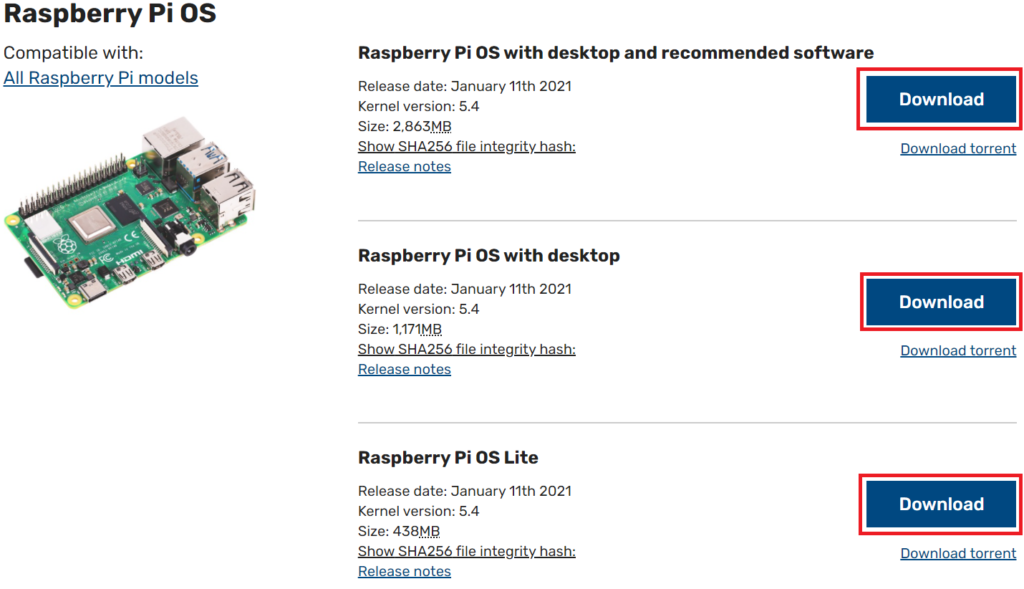
The differences are as follows.
If you are familiar with CUI, “Lite” is recommended because it is minimal.
If you want to connect to a monitor, I think “with desktop and recommmended software” is good.
| Image | Features |
| Raspberry Pi OS with desktop and recommended software | It’s all in. |
| Raspberry Pi OS with desktop | Standard desktop environment |
| Raspberry Pi OS Lite | Minimal functionality No desktop environment |
Proceed with the assumption that you have downloaded “Lite”.
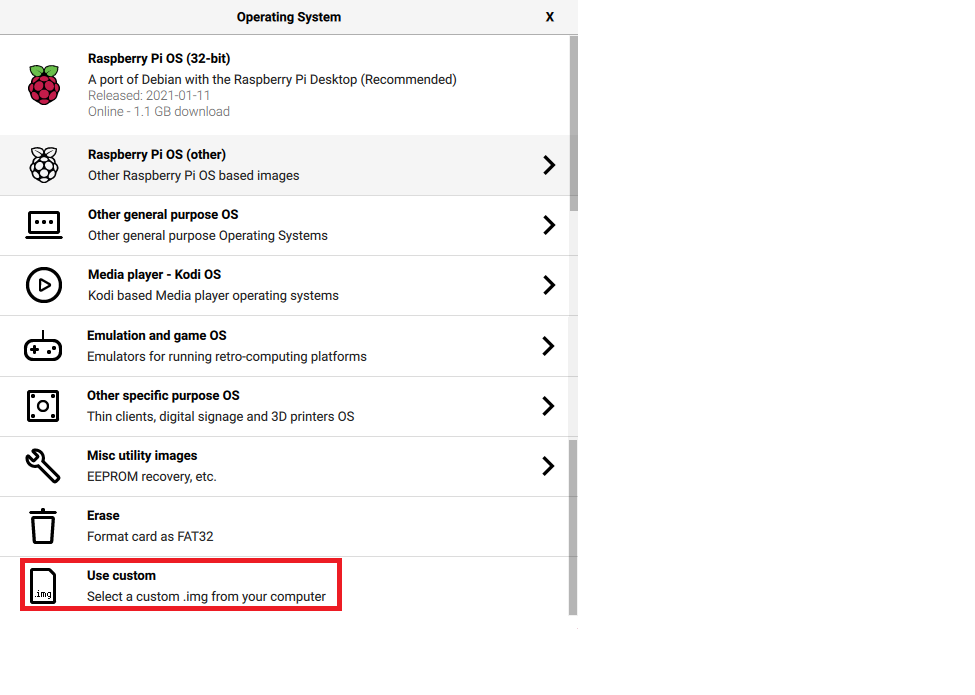
On the screen to select the OS, select Use custom and specify the img file in the downloaded zip.

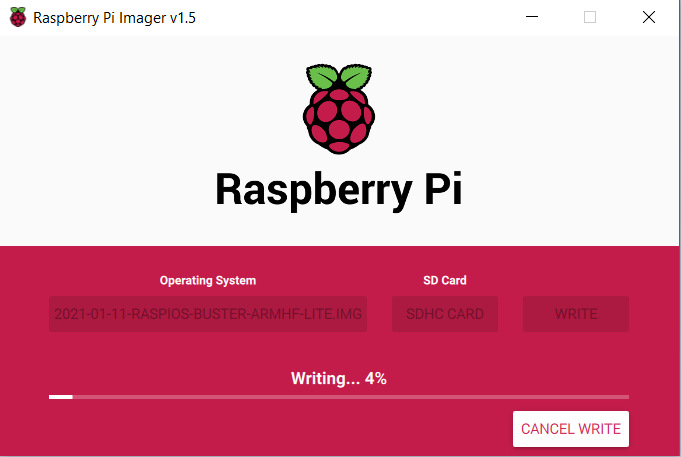
Let’s write selected OS image microSD in WRITE.
Yeah, it seems write operation is in progress!
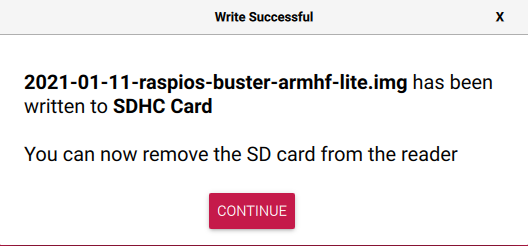
The write is complete!
Disconnect microSD once and insert it again.
Configuring SSH and Wi-Fi
SSH is disabled by default, so let’s enable SSH.
You can activate SSH by putting an empty file “ssh” on the boot partition.
– In below case E:\ssh

Wi-Fi settings can be done by making configuration file “wpa_supplicant.conf” on the boot partition as well.
The content is shown below.
– “myssid” and “mypassword” should be configured to fit your environment.
country=JP
ctrl_interface=DIR=/var/run/wpa_supplicant GROUP=netdev
update_config=1
network={
    ssid="myssid"
    psk="mypassword"
}
That’s it!
Conclusion
How was it?
If you run it with the dd command, you may initialize your HDD by mistake…
So if you want to operate it safely with a GUI app, imager is good!
I’ll try it at Ubuntu next time!
Comments