In below article, OS installation to microSD for Raspberry Pi is done with dd command on linux.
On the other hand, OS installation to microSD can also be done by GUI app named “Imager”.
Let me introduce how to use Imager.
So even if you are not familiar with LInux command you flash OS image to microSD.
I used Lubuntu 20.04.
If your host OS is Windows below article is useful.

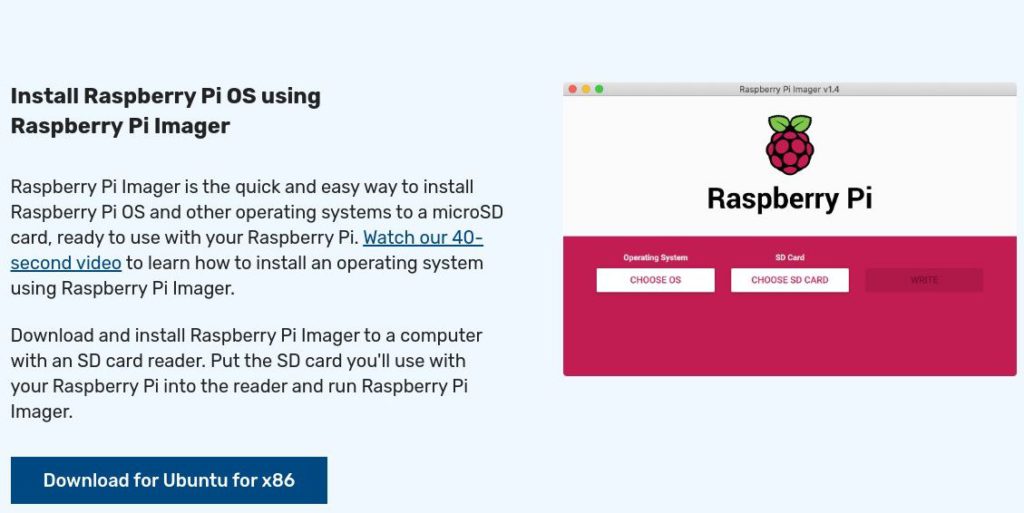
Downloading and installing Imager
apt command does not have corresponding package.
snap has Imager so that I can install it.
yasu@yasu:~$ sudo apt install rpi-imager
 Loading package list... Complete
 Creating dependency tree
 Reading status information... Complete
 No apt package "rpi-imager", but there is a snap with that name.
 Try "snap install rpi-imager"
 E: Package rpi-imager not found
 yasu@yasu:~$ sudo snap install rpi-imager
 2021-01-17T10:24:56+09:00 INFO Waiting for automatic snapd restart...
 rpi-imager v1.5 from Alan Pope (popey) installed
 yasu@yasu:~$
Please be noted that this message is valid only on Raspberry Pi OS.

There is also a deb file for Ubuntu on the official website.
You can download this and put it in with the dpkg command.
You can download it with the Download for Ubuntu for x86 button.
After that, you can install by dpkg command like this.
yasu@yasu:~/Download $sudo dpkg -i imager_1.5_amd64.deb
 You have selected the previously unsopened package rpi-imager.
 (Loading database ... There are currently 315599 files and directories installed. )
 imager_1 preparing to deploy .deb.5_amd64...
 Deploying rpi-imager (1.5) ...
 Setting rpi-imager (1.5) ...
 Processing desktop-file-utils (0.24-1ubuntu3) triggers ...
 Handling mime-support (3.64ubuntu1) triggers ...
 Handling hicolor-icon-theme (0.17-2) triggers ...
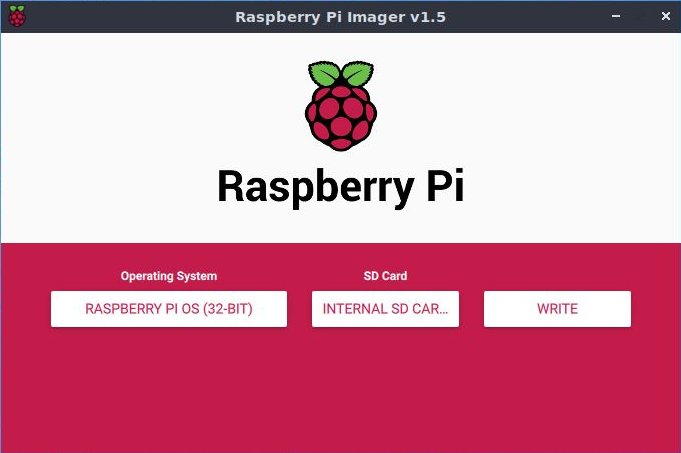
Writing OS image
Imager on Ubuntu looks almost the same as one on Windows.
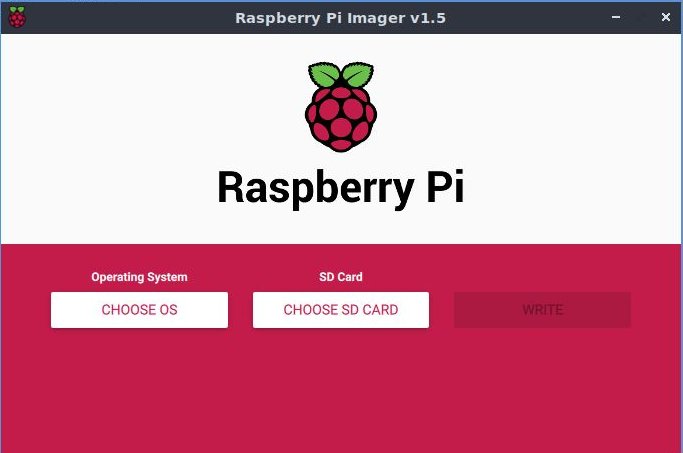
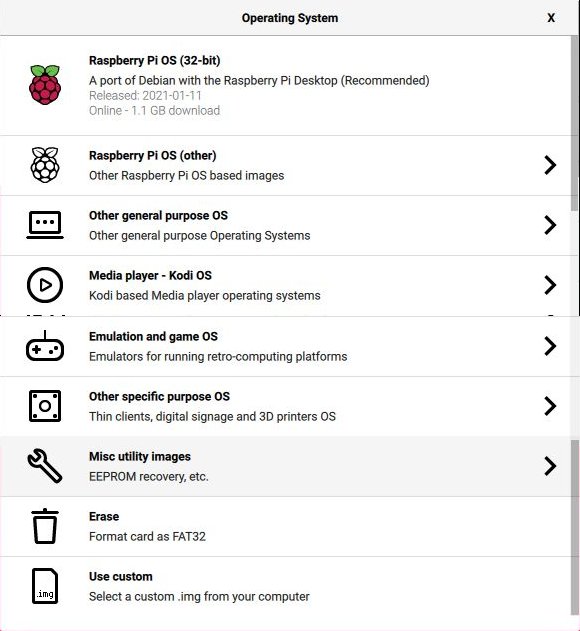
When you choose CHOOSE OS, you will be asked which OS to reflash to microSD.
Usually you may choose the top one “Raspberry Pi OS (32–bit)“.
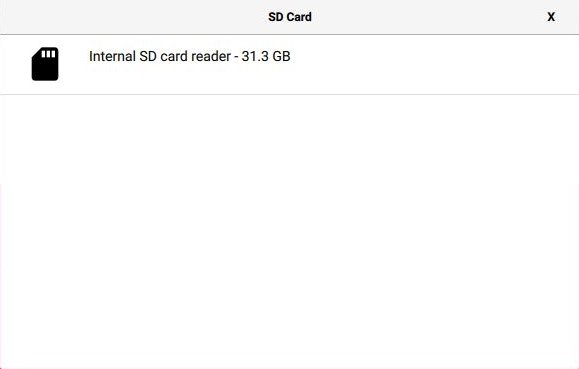
Next, select target microSD to reflash.
Linux “Imager” recognizes USB reader writer as well as microSD.
– Windows “Imager” does not.
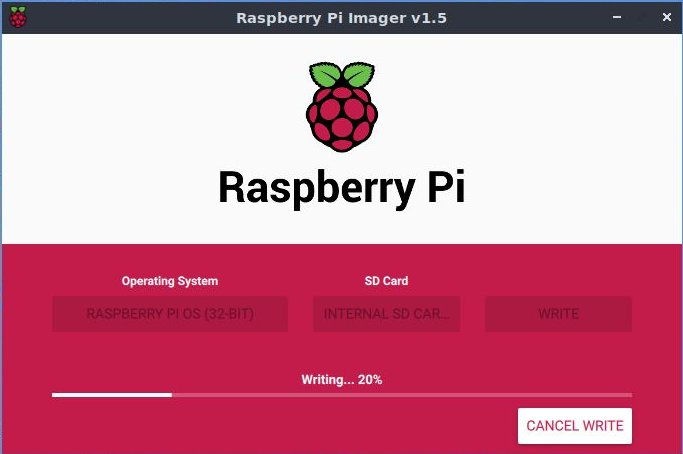
Click WRITE to start writing.
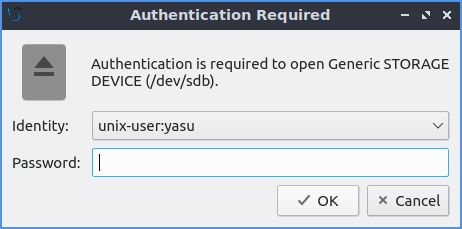
Since (L)Ubuntu is Linux-based OS, authentication is required here.
– In Windows, the authentication screen by UAC appears at startup of “Imager”.
Enter your password.
Great! Writing is progressing!
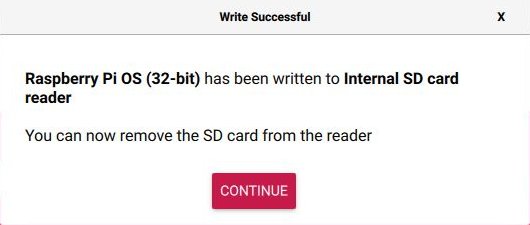
Reflashing is complete successfully!
If you get an network timeout error, below article contains how to resolve it.
– Download OS images manually and specify the img file downloaded.
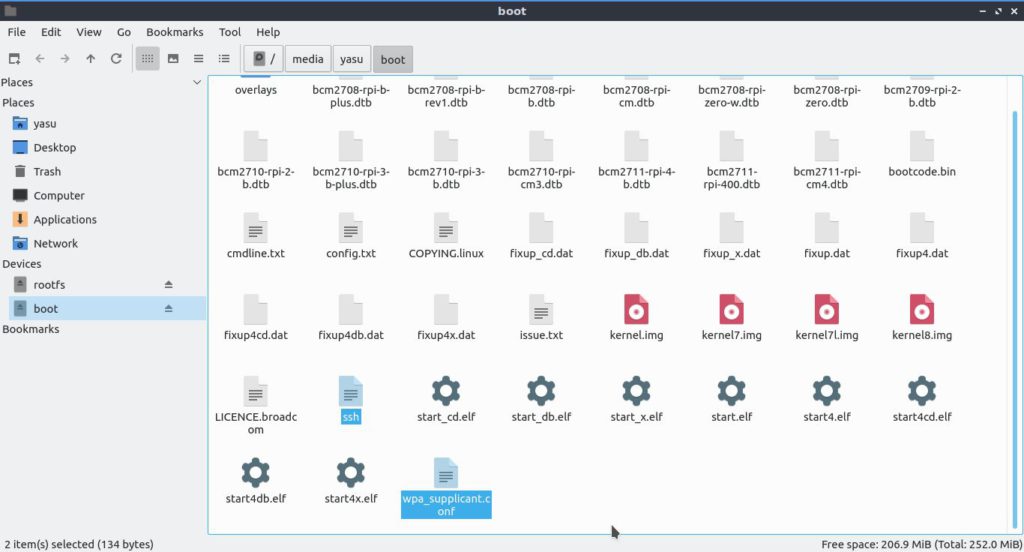
Configuring SSH, Wi-Fi settings
Activating SSH and configuring Wi-Fi can be also done on(L)Ubuntu.
SSH activation is performed only if you create an empty file named “ssh” on boot partition.
For Wi-Fi settings you need to make “wpa_supplicant.conf” with the following format.
– “myssid” and “mypassword” should be aligned to your environment.
– “country” may be necessary to be aligned to your country.
country=JP
ctrl_interface=DIR=/var/run/wpa_supplicant GROUP=netdev
update_config=1
network={
    ssid="myssid"
    psk="mypassword"
}
If you have done, I think it will be like the following screen shot!
The boot partition has an ssh/wpa_supplicant.conf file.
In Lubuntu, writing to boot partitions was easy because non super user can read/write.
If you face trouble that you cannot write in Ubuntu, below command is helpful.
Be careful not to touch other files!
In the worst case, the OS will not boot.
Close the window as soon as you finished.
sudo nautilus &
Conclusion
How was it?
Ubuntu and other easy-to-use Linux like Windows are also increasing.
GUI app is convenient and safe!


Comments