
我が家には2台のラズパイがあり、以下の通り運用しています。
①Nextcloudサーバー
②WordPressサーバー、sambaサーバー、ウィルススキャンサーバー
両方ともRaspberry Pi OSなのですが、Arch Linuxにしてみようと思い立ちました。
Arch Linuxは結構好きだったりする。
このPCもEndeavour OSだし
↓の記事では躓いて諦めたのですが、その後解決して使える状態になったので、まとめます。
Arch Linux 64bitインストール
↑の記事にも書いてありますが、改めて。
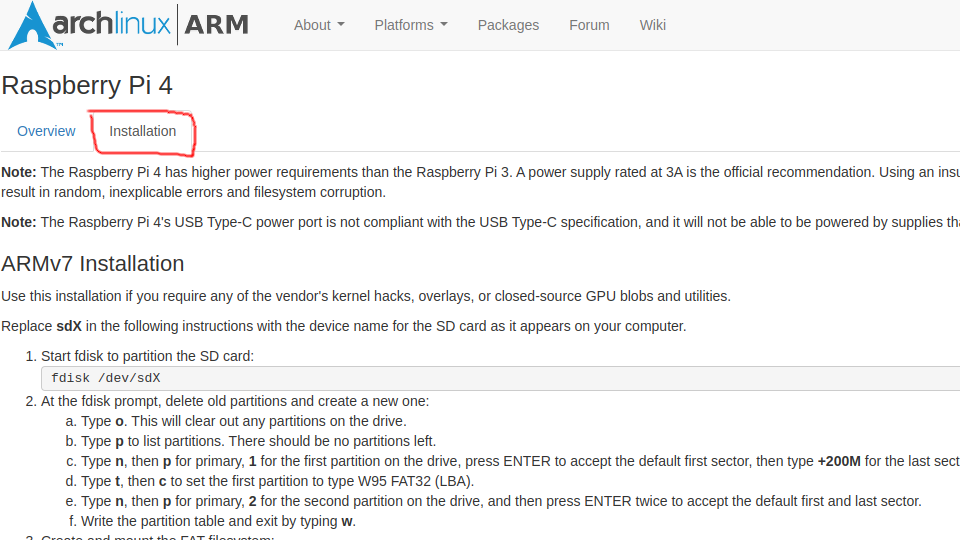
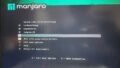
まずこのサイトの手順に従い、Arch Linux 64bitをmicroSDか何かに入れます。
以降microSDとして説明

このInstallationに書いてあるとおりやれば問題なくインストール作業が完了すると思います。
自分の環境では以下の通り/etc/fstabに追記が必要でした。
追記しないとReadOnlyになってしまうのですが、真因はまだわかっていないです…
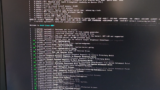
$ sudo vi /etc/fstab
# Static information about the filesystems.
# See fstab(5) for details.

# <file system> <dir> <type> <options> <dump> <pass>
/dev/mmcblk0p1  /boot   vfat    defaults        0       0
/dev/mmcblk0p2  /   ext4    defaults        0       0 # <- 追記
rpi-updateでファームウェア更新
お次はrpi-updateでファームウェアを更新。
元情報は↓のYoutubeに書いてあるコメント。
具体的には以下の通り。
rpi-updateはRaspberry Pi上でないと動かないので注意。
$ git clone https://github.com/Hexxeh/rpi-update
$ cd rpi-update
$ sudo BOOT_PATH=$HOME/boot ROOT_PATH=$HOME/root ./rpi-update
 *** Raspberry Pi firmware updater by Hexxeh, enhanced by AndrewS and Dom
 *** Performing self-update
 *** Relaunching after update
 *** Raspberry Pi firmware updater by Hexxeh, enhanced by AndrewS and Dom
FW_REV:ecb31dc9a698ff9d17d9a5a24550ea5b9aaea7eb
 *** We're running for the first time
 *** Backing up files (this will take a few minutes)
 *** Remove old firmware backup
 *** Backing up firmware
 *** Backing up modules 6.1.21-v8+
WANT_32BIT:0 WANT_64BIT:1 WANT_PI4:1
#############################################################
WARNING: This update bumps to rpi-6.1.y linux tree
See: https://forums.raspberrypi.com/viewtopic.php?t=344246
'rpi-update' should only be used if there is a specific
reason to do so - for example, a request by a Raspberry Pi
engineer or if you want to help the testing effort
and are comfortable with restoring if there are regressions.
DO NOT use 'rpi-update' as part of a regular update process.
##############################################################
Would you like to proceed? (y/N)
 *** Downloading specific firmware revision (this will take a few minutes)
  % Total    % Received % Xferd  Average Speed   Time    Time     Time  Current
                                 Dload  Upload   Total   Spent    Left  Speed
  0     0    0     0    0     0      0      0 --:--:-- --:--:-- --:--:--     0
100  116M    0  116M    0     0   9.9M      0 --:--:--  0:00:11 --:--:-- 10.9M
 *** Updating firmware
 *** Updating kernel modules
 *** depmod 6.1.25-v8+
 *** Updating VideoCore libraries
 *** Using SoftFP libraries
 *** Updating SDK
 *** Running ldconfig
 *** Storing current firmware revision
 *** Deleting downloaded files
 *** Syncing changes to disk
 *** If no errors appeared, your firmware was successfully updated to ecb31dc9a698ff9d17d9a5a24550ea5b9aaea7e
起動
microSDをRaspberry Piに装着して起動します。
ログインは、
ユーザー名 alarm
パスワード alarm
もしくは、
ユーザー名 root
パスワード root
で入れます。
とりあえずpacmanで最新に。
$ sudo pacman-key --init
$ sudo pacman-key --populate archlinuxarm
$ sudo pacman -Suy
ここまでで素のArch Linuxが動く状態になりました。
素のviだときついのでvimを入れます。
$ sudo pacman -S vim
後々使うであろうyayも。
参考記事
$ sudo pacman -S base-devel git go
$ git clone https://aur.archlinux.org/yay.git
$ cd yay
$ makepkg -si

# 後始末
$ cd ..
$ rm -rf yay
タイムゾーン設定
タイムゾーンをAsia/Tokyoに設定。
参考記事
$ sudo timedatectl set-timezone Asia/Tokyo
IPアドレスの固定
デバイス名を確認すると、end0であることがわかります。
$ ip a show
(略)
2: end0: <BROADCAST,MULTICAST,UP,LOWER_UP> mtu 1500 qdisc mq state UP group default qlen 1000
    link/ether 12:34:56:78:90:ab brd ff:ff:ff:ff:ff:ff
    inet 192.168.1.94/24 brd 192.168.1.255 scope global end0
       valid_lft forever preferred_lft forever
(略)
end0用の設定ファイルを作成。
$ sudo vim /etc/systemd/network/end0.network
[Match]
Name=end0

[Network]
Address=192.168.1.23/24
Gateway=192.168.1.1
DNS=192.168.1.1

# もともとen*向けの設定ファイルがあったので削除
$ sudo rm /etc/systemd/network/en*.network

# 設定反映のため再起動
$ sudo reboot
ホスト名設定
初期状態ではホスト名がalarmなので、変更しておきます。
$ sudo vim /etc/hostname
nextcloud-server

# 設定反映のため再起動
$ sudo reboot
rootユーザーのパスワード変更
初期値ではパスワードがrootなので、忘れずに変更しておきます。
$ sudo -s
passwd
New password: (パスワードを入力)
Retype new password: (パスワードを入力)
passwd: password updated successfully
新規ユーザー作成
新規ユーザーyasuを作成。
adduserがなかったのでuseraddで作成。
ついでに/etc/sudoersにも追加。
$ sudo useradd yasu

$ sudo passwd yasu
New password: (パスワードを入力)
Retype new password: (パスワードを入力)
passwd: password updated successfully

$ id
uid=1000(alarm) gid=1000(alarm) groups=1000(alarm),998(wheel)
$ id yasu
uid=1001(yasu) gid=1001(yasu) groups=1001(yasu)

$ visudo
(略)
yasu ALL=(ALL:ALL) ALL # 末尾に追加
もともとあったユーザーalarmは不要になったので、消します。
$ sudo userdel -r alarm
$ ls /home/
yasu
$ id alarm
id: 'alarm': no such user
もしuserdelでエラーが出た場合は、↓の記事に書いたとおり再起動すると良いです。

SSHログインに公開鍵認証を使うようにする
これはこちらの記事ほぼそのままなので、解説を譲ります。

ロケールの設定
まずロケールを追加します。
自分はen_US.UTF-8で使うことが多いですが、日本ロケールの場合はja_JP.UTF-8で。
$ sudo /etc/locale.gen
(略)
# en_JS.UTF-8 # <- 先頭の # を削除する
(略)

# ロケール生成
$ sudo locale-gen

# 起動時の設定
$ sudo vim /etc/locale.conf
LANG=en_US.UTF-8
argononedのインストール
自分はこのケースを使っているので、ファン及びスイッチ制御用のargononedを入れます。
Raspberry Pi OSだとaptで入れられますが、Arch Linuxでは自分で入れる必要があります。
参考ページ
$ sudo pacman -S i2c-tools lm_sensors python
$ mkdir argonone
$ cd argonone
$ curl -o PKGBUILD https://raw.githubusercontent.com/Elrondo46/argonone/master/PKGBUILD
$ curl -o argonone.install https://raw.githubusercontent.com/Elrondo46/argonone/master/argonone.install
$ makepkg --install

$ sudo systemctl daemon-reload
$ sudo systemctl enable argononed
記事執筆時点ではargononed.pyに不具合がありまともに動かないので、修正しておきます。
try節の直後にあるbus.write_byte()のところ。
$ sudo vim /opt/argonone/bin/argononed.py
(略)
def temp_check():
    fanconfig = ["65=100", "60=55", "55=10"]
    tmpconfig = load_config("/etc/argononed.conf")
    if len(tmpconfig) > 0:
        fanconfig = tmpconfig
    address = 0x1a
    prevblock = 0
    while True:
        temp = os.popen("cat /sys/class/thermal/thermal_zone0/temp").readline()
        val = float(temp) / 1000
        block = get_fanspeed(val, fanconfig)
        if block < prevblock:
            time.sleep(30)
        prevblock = block
        try:
            bus.write_byte(address,block) # もとは bus.write_byte_data(address,0,block)
        except IOError:
            temp = ""
        time.sleep(30)
(略)
設定して動作確認します。
一度「1」に設定して、ファンが全力で回ることを確認しておきましょう。
$ sudo argonone-config
--------------------------------------
Argon One Fan Speed Configuration Tool
--------------------------------------
WARNING: This will remove existing configuration.
Press Y to continue:Y
Thank you.

Select fan mode:
  1. Always on
  2. Adjust to temperatures (55C, 60C, and 65C)
  3. Customize behavior
  4. Cancel
NOTE: You can also edit /etc/argononed.conf directly
Enter Number (1-4):2

Please provide fan speeds for the following temperatures:
55C (0-100 only):10
60C (0-100 only):50
65C (0-100 only):100
Configuration updated.

# 後始末
$ cd ..
$ rm -rf argonone
docker, docker-composeのインストール
自分はNextcloud環境でdockerを使うので、dockerとdocker-composeを入れます。
$ sudo pacman -S docker docker-compose
Nextcloudをdockerで動かす方法はこの記事で解説しているので、ご興味あればどうぞ。

vpnclientのインストール
自分はAWSにあるLightSailとでSoftEtherによるVPNを構築しているので、vpnclientを入れます。
ほぼこの記事そのままです。
証明書による認証に変更。

電源ON時にvpnclient自動起動してvpnserverに自動接続するよう設定。

以上でだいたい初期設定は終わりです。
あとはお好みに合わせていじっていけばいいと思います。
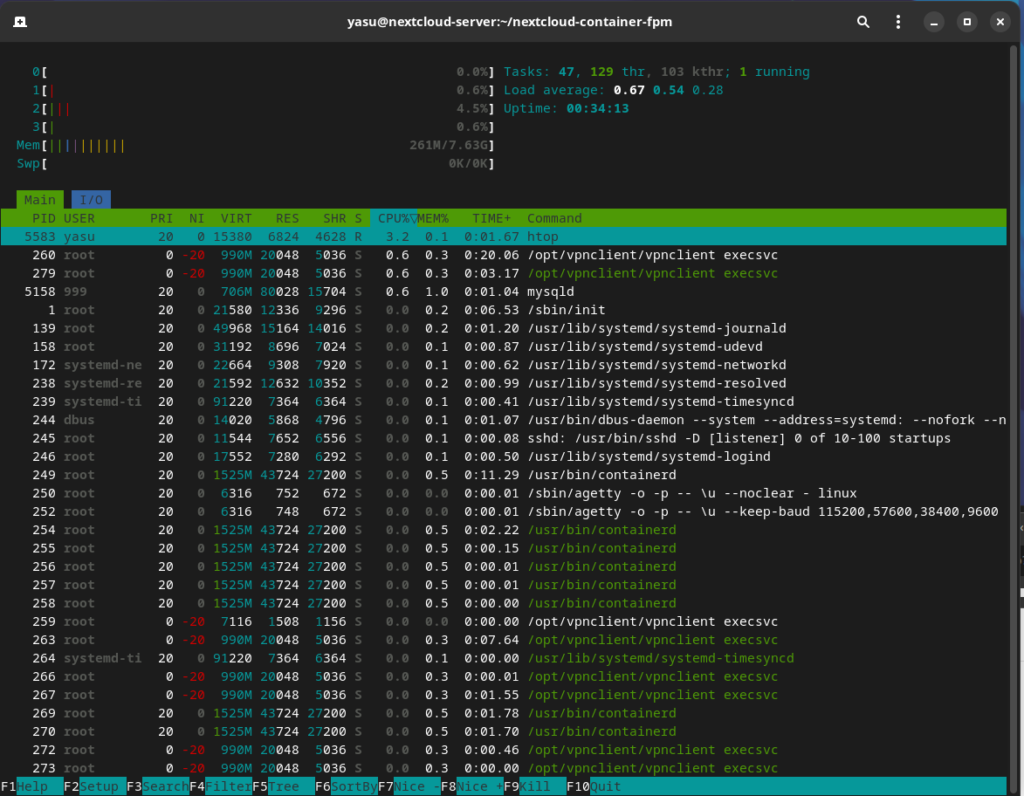
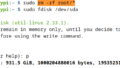
ちなみにこれがhtopしたときの画像です。
メモリは265M使用ということで、だいぶ軽いことがわかります!
終わりに
いかがでしたか。
PCでのノウハウがほぼそのまま使えるので、意外にササッと設定できますよ!
Comments